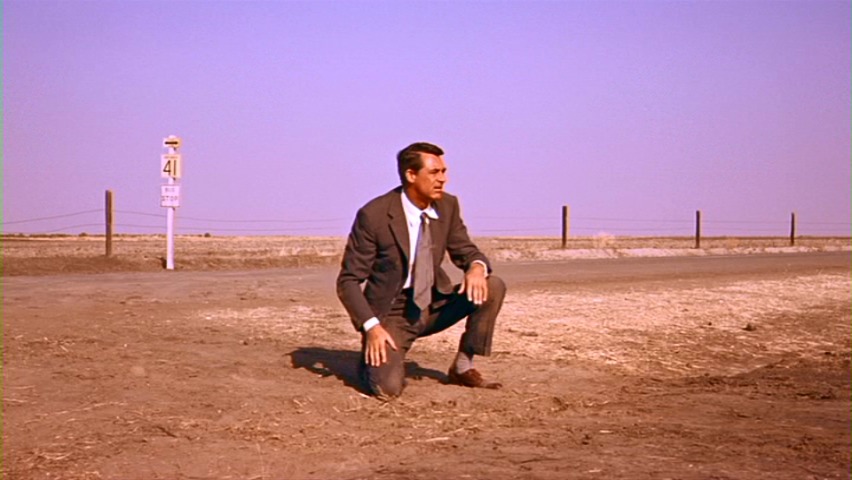
With HDSLRs, and now large sensor video cameras, those of us who shoot video have blessed with the ability to shoot insanely shallow depth of field (DOF). For the last 12 months we have been bombarded with videos shot at F1.8 and faster, and while shallow DOF can look gorgeous I believe a lot of people have not fully harnessed the power, and use, of depth using their lenses aperture.
So rather than complain about it, here are some points I have been learning about DOF in my journey as an ever-aspiring filmmaker.
1. Don’t be afraid of Deep DOF
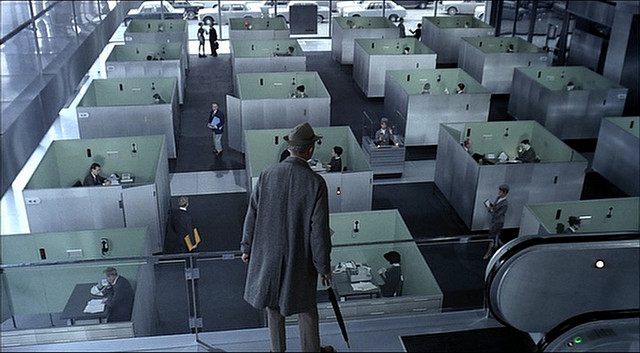
“To make your video look like film use shallow depth of field.” This is a line I hear a lot, especially from DSLR shooters and it could not be farther from the truth. Yes, films use shallow DOF but that does not make them films. Depth of field is a tool with which to sculpt your shots. So just because we can now shoot at F1.2 does not mean we should. I know most of us are recovering from Large Sensor Deficiency Syndrome but with a little education and therapy, we can move on.
2. Understanding Selective Focus
Selective focus is simply using DOF to isolate a subject. The shot below is from Defiance and is an excellent example of selective focus. While there are subjects walking behind and in front of Daniel Craig’s character, our focus is on him:
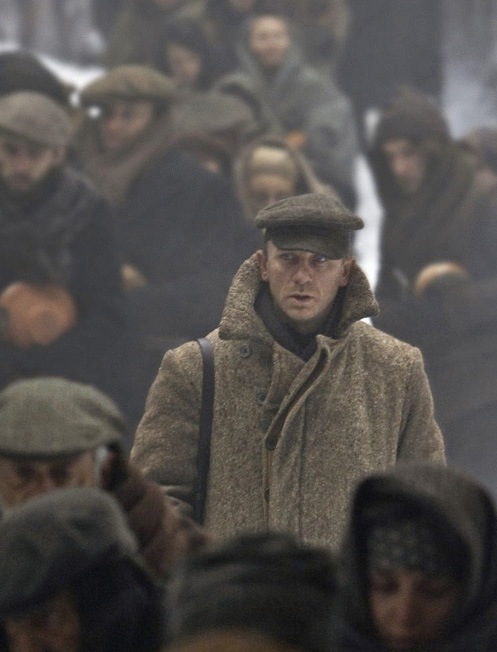
Using this method you can direct the focus of your audience toward whatever element you desire to showcase. Thus subconsciously telling them “this is important.”
Its also important to be thinking about how shallow to shoot. Study this shot from The Social Network:

We are instantly focused on the character in the center of the shot. As we examine it, we notice to the camera right another key character.
Now look what happens when we look at a shot that is in all ways identical to the last, except for a difference in DOF:
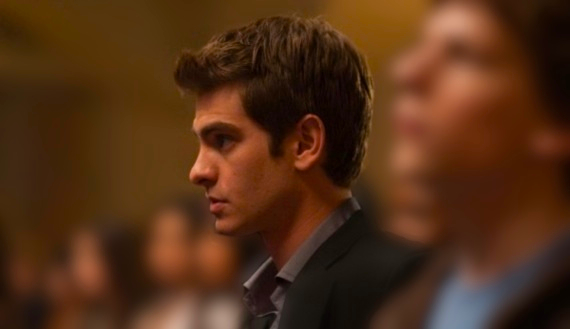
In this shot the DOF is far shallower than the first. Two problems become apparent. The first is how odd and unnatural it looks. The people on the left are now unrecognizable blobs, and the character center screen sticks out too much. This is a BIG problem. The last thing you want to do is distract your audience and remove them from the story. The second issue with this shot is that we can no longer easily discern who the other character is. Are these the two best friends? Or is the character on the right a complete stranger? We now see how critical the use of DOF is for selective focus.
3. Don’t Create Muddy Shots
Something I see a lot on Vimeo and YouTube is “muddy” shots. These are shots where someone shoots wide open at F2.0 or faster and part of the subject is out of focus, creating a “muddy” look. Here is a shot from Abortion, a short I shot last year where I made this mistake:

Notice the talent’s right eye (our left) is just slightly out of focus. click the image to enlarge. While not terribly noticeable on a computer screen, when displayed on the big screen it becomes far too distracting. After making that mistake I created two rules for myself:
- Rule One: When photographing peoples faces I make sure their eyes and face are in focus. Its ok if the hair goes out a bit.
- Rule Two: If I do put one eye out of focus it has to be at least a 20% difference from the one in focus. This clearly separates the two. When the eye is just out of focus it becomes distracting.
There are a few exceptions but for the most part I find these rules to help keep my shots from becoming distracting.
People aren’t the only thing to keep from shooting “muddy.” Here are two simple shots that show the difference between a muddy shot and a clear one:
The first shot of the showerhead is the clear one. While the handle is out of focus, it is consistently out all the way down. And the sprayer head is completely in focus. But notice in the seconded shot, half the showerhead is in focus and the other half is out. You can tell it looks sloppy when compared with the first shot. See the difference? The same goes for the book text. Notice the first shot the text is readable and you can tell its a page from a book. While the second shot does have the text in focus, you can barely tell what the rest of the image is. Its all cloudy. If we don’t show that it’s a page from a book the audience may spend time trying to figure out what it is and not read it. Which brings us to our next point.
4. Don’t Confuse Your Audience
Something else to consider when setting your DOF is scene clarity. A great example of good shot clarity can be seen in this shot from Inception:
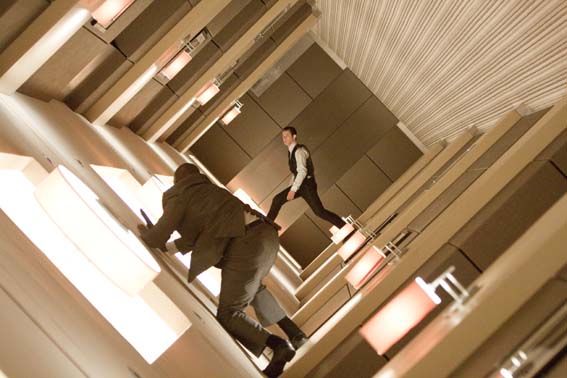
This is a shot from an obviously complicated scene. In situations like this shooting with deep DOF keeps the layout of environment clear to the audience. Again we don’t won’t to remove the audience from the story by disorienting them, which you can see with this scene would not be hard to do.
Using DOF to Create Intimacy
When you really think about it, DOF is just another framing edge. Just like left, right, top, and bottom of the frame can be used to isolate the scene; DOF can be used to control how deep a scene is. This gives the cinematographer the option to limit space. Take for example a parking lot. While in reality it may be a large space, using shallow depth of field one can create a very small, intimate scene with a character.
Check out this shot from Dear Frankie:
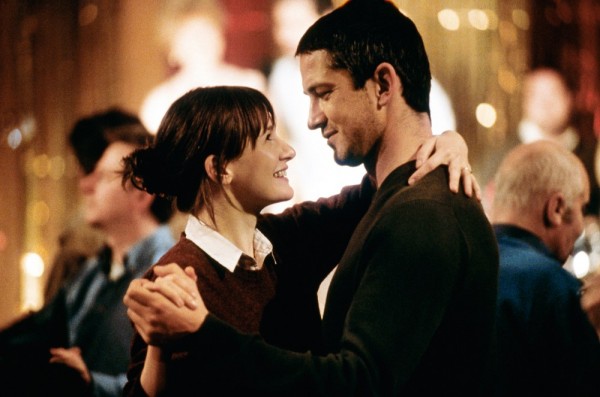
In this scene our two characters are dancing on a large set. Using shallow DOF Cinematographer Shona Auerbach has created a very intimate scene. By putting other people and elements out of focus, he has created a moment that, as viewers, we can really focus and connect with the characters.
Conclusion.
So you can see how powerful DOF can be when used properly. Next time you lens your camera and choose your aperture, take some time to think about depth. Ask yourself the following questions:
- What am I shooting?
- Where am I directing the eyes of my audience?
- Is this depth confusing?
- How intimate is this scene?
- Why am I using this depth?
So get off the computer, grab your camera and some friends, and tell a story!
Copyright Information:
The images use in this article have been displayed in the light of the following:
Copyright law contemplates fair use of a copyrighted work without permission shall be for purposes such as (1) scholarship and research, (2) teaching, and that such fair use will not result in the infringement of a copyrighted work (Citation).
