I have filmed LOTS of interviews over the past 4 years, more than I could possibly count. Many look bad in my opinion, but when you do that many interviews you pick up a lot of lighting tricks and tools. In today’s video I show you how to build a key light rig that I use.
Why this kit rocks
- Affordable – $300-$800 depending on the lights you use.
- Efficient – Tear down and setup is fast. Not to mention you can move the whole setup easily.
- Luminously Lush – The more light you have the more flexibility you have to light your set.
- Upgradable – This kit will grow with you for decades. Just swap out lights and go.
What You Need
 1. C-Stand
First you will need a C-Stand, I like the turtle base version from Impact but you could use any C-Stand. For my full review on the C-Stand check out this article.
You will also need a double or triple header. This is that bar that lets you use two lights on one light stand.
- Double Header
- Triple Header, Option 2 (Recommended)
 2. Lights
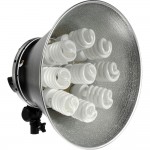
You can really use any two lights for this. So for example, I plan on upgrading to two Alzo HID 3000 lights in the near future which will work great with this setup. But the Octacool lights I mentioned in the video work great and are a little cheaper.
 3. Silk
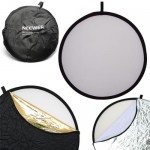
Anything that will soften your light will work. I use this cheap 5 in 1 reflector from Amazon.
Don’t forget to pick up some clamps for attaching your silk to the stand.
Results
A lot of my work has been filmed using this setup type of setup. Check out my reel to see some shots using this kit.
Fourth Foundry 2013 Reel from Caleb Pike on Vimeo.