This is a studio setup I’ve been working on since I started DSLR Video Shooter in 2010. Read/watch on to see how I’ve set things up and what gear I use to make better videos faster!
Room and Sound Treatment
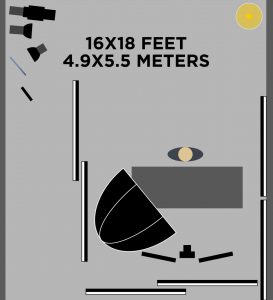 The space I’m using is a 16×18′ (288ft²) corner of my studio with thin office carpet, drop ceilings and no windows. While the larger size is nice, you could easily scale this setup down to suit your space.
Here is a top down view of my entire setup to give you an idea of where everything sits in the space. Take note of the black and white blankets as I will be referencing that here in a bit.
For sound treatment I decided to go exclusively with Producers Choice Sound Blankets as I’ve tried foam and wood framed panels but nothing has been as cost and result effective as these blankets. If you take anything away from this video and article let it be this… Spending money on acoustic treatment will increase the quality of your videos more than just about anything else mentioned here. I would take a $50 microphone and a well treated room over a $5000 microphone in a poorly treated room.
Ceiling
For the ceiling, I took several full size blankets and cut little slits so I could mount them to my drop ceiling. I found this simple 3D printed mount model that allows you to mount a 1/4 20″ bolt to traditional drop ceiling rails. From there I designed and 3D printed some simple washers and mounted the blankets with a 1/4 20″ bolt and nut.
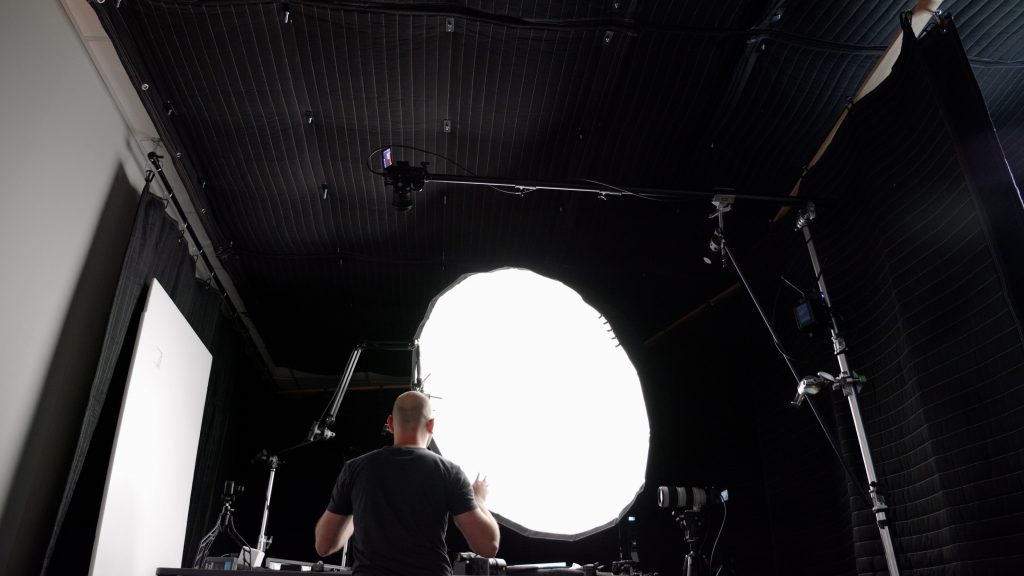
I love how the ceiling turned out but a much simpler method would be to buy these 24×48 inch blankets and mount them with a S-hooks and clips to the ceiling. The only downside to this is that it looks a little sloppy and might not absorb as much sound as my seamless solution.
Sound Walls
To separate the studio area from the rest of the room (which is about 1000ft²) I built several rolling stands made of two 80×80 black and white sound blankets. These can be moved around the studio for better sound or used as a bounce or negative fill light modifiers. I’ve done a dedicated video on these and they are one of the best investments in my studio.
On the wall next to the desk I just hung blankets from the ceiling as I had no need to move these. See the diagram above to see the final layout of the setup with the blankets in place.
The Desk
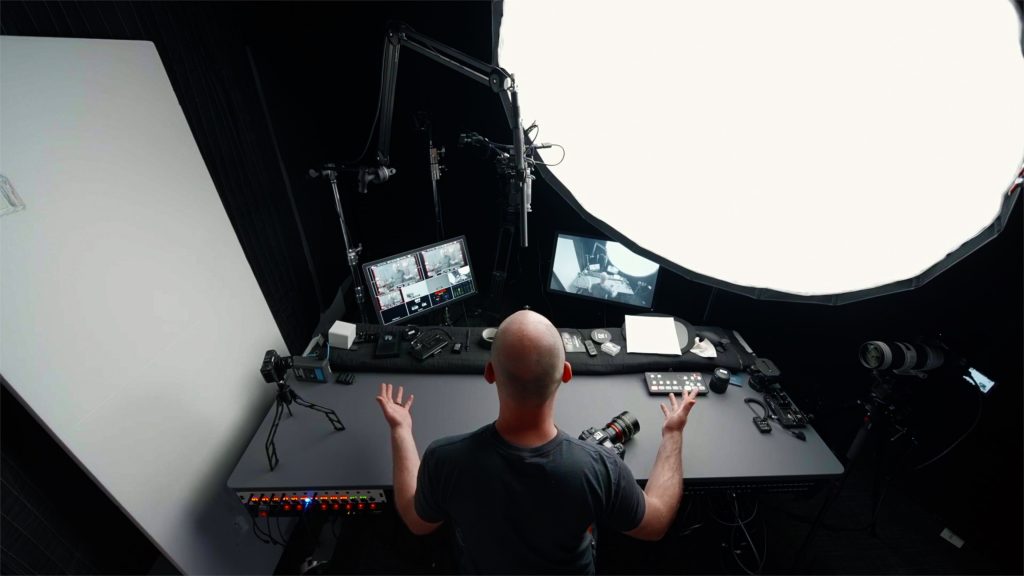
For the desk I went with the Uplift Commercial C Leg desk with an 80×30″ white top. I ended up adding a grey vinyl wrap over the desk as the white was acting as a fill light which didn’t look good on the old chin! Originally I had plans to move the desk around and change heights a lot, but after a while I settled into this one spot. Needless to say this thing is way overkill now as I could have just used a regular desk or this budget desk on Amazon. That said, This thing is a beast and you can mount A TON of weight on or under it and I love the giant size.
The Cameras
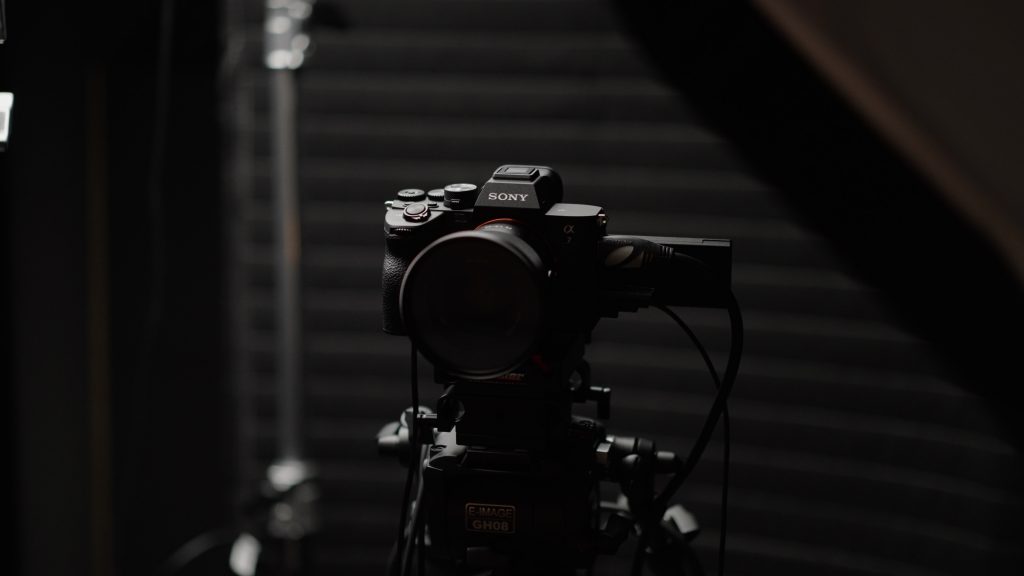
For this setup I primarily use a single Sony A7 IV with the Sony 35mm F1.8 mounted to an E-Image GH06. I also have a Tiffen Black Pro Mist 1/8th filter which softens the highlights just a bit. You watch a comparison between this filter and no filter here.
Sometimes I use a second camera when I need a top down shot of the desk. For this I either the A7 IV or A7s III with a Tamron 28-75mm zoom lens. This camera mounted a stand setup which consists of an Impact C-Stand with this Impact Boom Arm. On the end of the boom arm I’ve used a Rapid Baby adapter and Ball Head to mount the camera. This setup is really solid allowing me to boom the camera pretty far over the desk without issue.
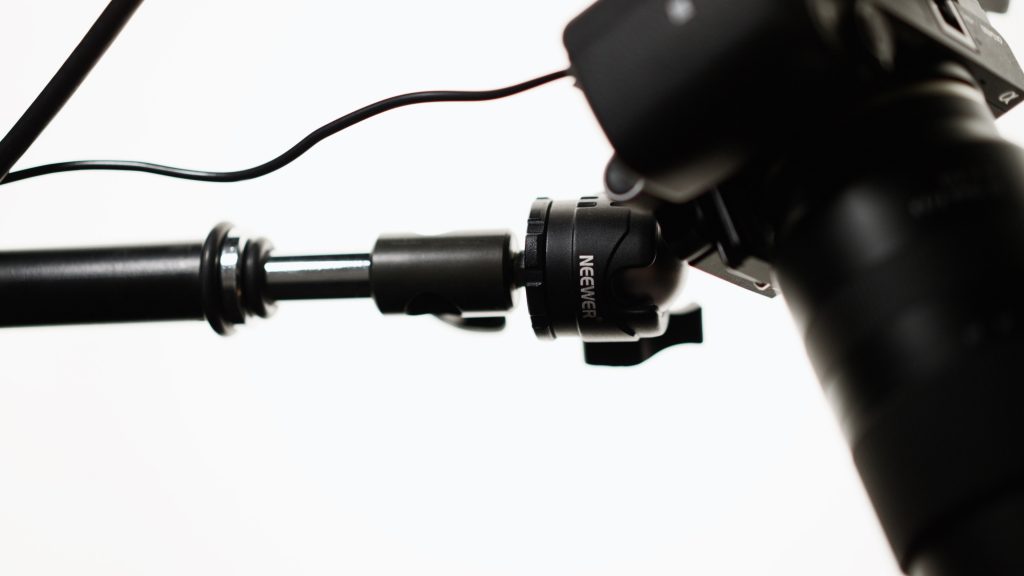
For my video courses I will often have a third camera just off of the desk to get a close ups And this is just done with a cheap tripod.
Monitors and Video Switcher
Just off to the the left and right of the main camera, I have two 27 inch monitors. These are a little older and if I were buying today I’d go with this 27 inch BenQ model instead.

I used these to monitor my cameras and computer if I’m doing a software tutorial. The left monitor is connected to an Atem Mini Pro ISO which is connected to all of my cameras. This allows me to see everything at once on one of the monitors or press the Program button to pull up each camera angle full screen. If desired, I can also record each HDMI input onto an SSD for backup while filming. If you don’t need to record each and every camera, the Atem Mini Pro (non ISO) also supports multi-view and would work just fine.
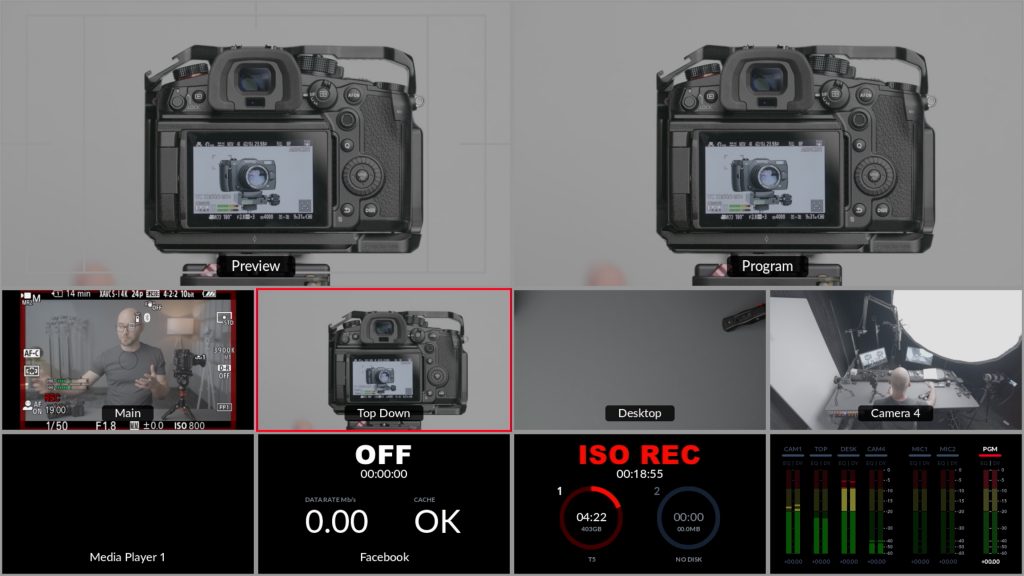
HDMI Patch Panel from Heaven
Easily one of my favorite additions to this setup is my HDMI patch panel. It is just want it sounds like. Panel where I can connect or “patch” different devices to each other over HDMI. This is pretty nerdy but the end result IS INCREDIBLE so stay with me here!
First I installed another wall rack mount bracket and installed it under my desk on the right hand side. Again, I bought a 4U but a 2U would also work well.
Then I bought two of these keystone patch panels. A Keystone is a simple connector slot where you can insert different connectors, passthrough adapters and more.
Next I purchased a few bags of these HDMI keystones. In short, these are female to female HDMI couplers that snap into that keystone patch panel.
From there, I ran every single HDMI device to the patch panel and labeled everything. To stay organized I put “FROM” devices (cameras, HDMI output of the Atem Mini etc.) on the top patch panel and “TO” devices (Monitor, Atem Inputs etc.) on the bottom patch panel.
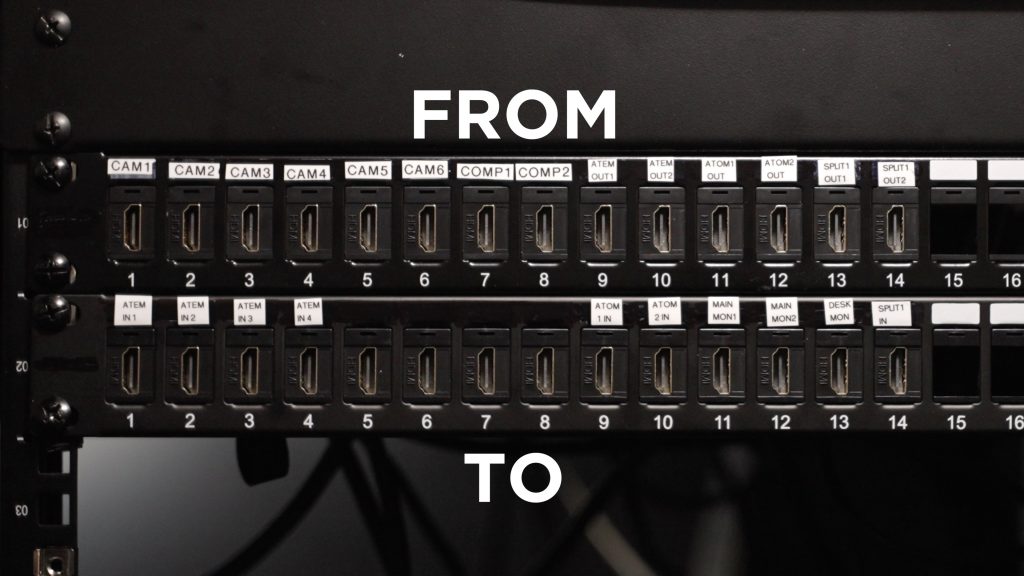
Once everything is connected you can route your camera feed anywhere in seconds. No more running HDMI cables all over the place! Need the camera to go to the main monitor? Connect CAM1 to MON1. Realize you need to actually run the camera to an Atomos recorder first then send that feed to the monitor? No problem! Connect CAM1 to ATOMOS1 IN then ATOMOS1 OUT to MON1. Done!
Again, very nerdy stuff, but once you get everything connected, you never have to do long cable runs again. Just patch it and walk away!
Another great feature is that this system takes the wear and tear of connecting and disconnecting cables away from your camera’s HDMI jack and onto the patch panel. It only costs around $2 for a new HDMI keystone. Fixing a camera’s dead HDMI jack will cost you a lot more!
The other awesome thing is you can use ANY CONNECTOR not just HDMI. Need to patch headphone cables, 3.5mm microphones, XLR or SDI? All of these connectors come in either keystone or what is called d-series connectors (see d-series patch panel here) so you can patch anything! I hope to add a bunch of audio patches to this panel in the future. But for now I’m just trilled to have HDMI taken care of.
Power

All of the power for the lights, cameras, monitors and everything else is done from a little rack mount setup mounted under the left side of the desk. In short, I took this wall rack mount bracket and screwed it to the underside of the desk. These come in several sizes but I went with a 4U which can hold 4x 1U rack mountable accessories. The rack mount I linked to above gives you several size options if you want something smaller or larger.
From there I mounted four 1U racks. The first two racks are custom camera power boxes I made. Very niche and not needed unless you review cameras and are sick of all the different power requirements.
The third slot is taken up with a rack mounted power strip with GIANT switches. This thing is fantastic for being able to control my lighting, cameras, monitors and more. The switches face the front and there are corresponding outlets on the back (6 switched outlets).
The fourth rack accessory is a simple rack mountable power strip with 12 outlets and 1 power switch. I have THE ENTIRE VIDEO SET plugged into this thing including the other power strip I mentioned earlier. This means with one single switch I can fire up the entire studio and start filming a video. No more walking around turning everything on and off.
The Audio
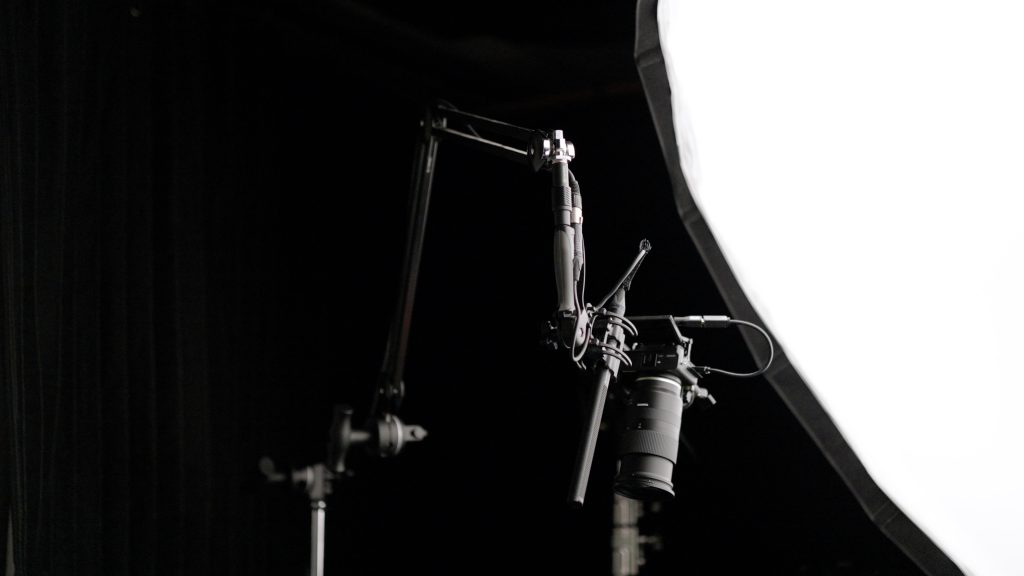
After testing a ton of microphones, I finally bit the bullet and purchased the Sennheiser MKH-416 and haven’t looked back. I’ve mounted the microphone to another Impact C-Stand with a with a grip head and a 20″ grip arm. On the end of the grip arm, I’ve mounted a Rode PSA Mic arm with Rycote Shotgun mount. This allows me to grab the microphone and perfectly position it just out of frame. A tradition boom arm setup would work fine but having the ability to easily move the microphone makes a big difference.
To record my sound, I run the MKH-416 into a Sound Devices MixPre-3. These can be hard to find these days so you may have to upgrade to the MixPre-6 in some cases. Like most of the gear in this post, you can obviously go with something much more affordable like running sound straight to camera or using a budget recorder from Zoom or Tascam.
The give myself a backup recording, I also run the output of the MixPre-3 to my main camera just incase something goes wrong. The MixPre-3 and MKH-416 make for an amazingly clean combo that sounds great and is very reliable. You can always shoot b-roll to save bad looking video, but you can’t easily fix audio without a reshoot!
The Lighting
This setup has grown over the years and now utilizes 6 lights all of which are described in detail below.
The Key Light
My main light consists of an Aputure 300X firing through a Fotodiox Pro 60″ Parabolic Soft Box. I may end up switching this light out as there are much more affordable options that work just as well. The GIANT soft box create a really beautify fall off on the face. You could go with a small soft box or an LED mat but to get soft light, you need BIG lights.
The Background Lights
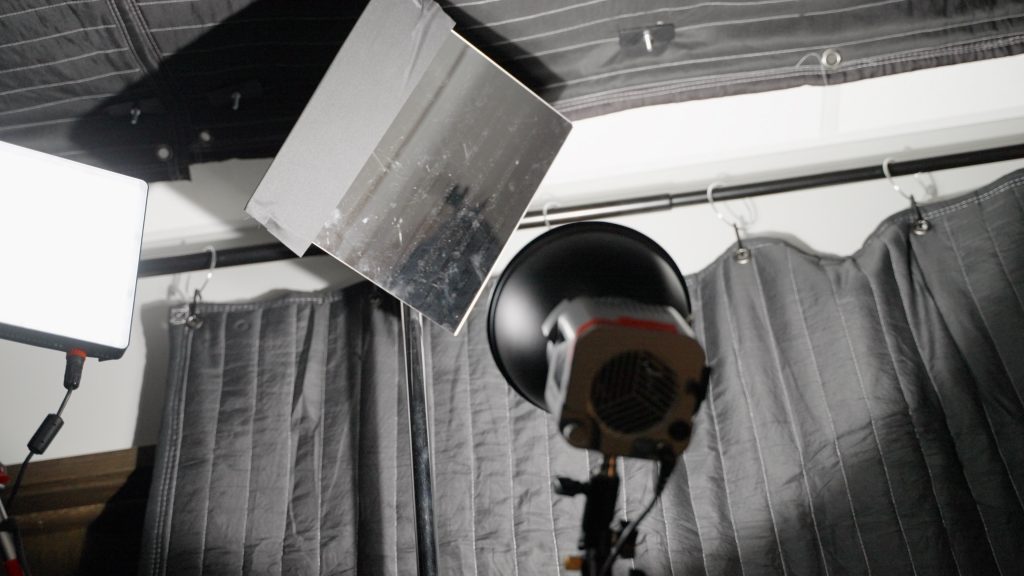
There are 4 lights lighting the background of my main shot. The first is a Amaran 60D (video review here) firing into an acrylic mirror to create a fake window box on the back wall. I’ve done a video on using mirrors to light and highly suggest you check it out. It can really sell you lighting and add a lot of depth.
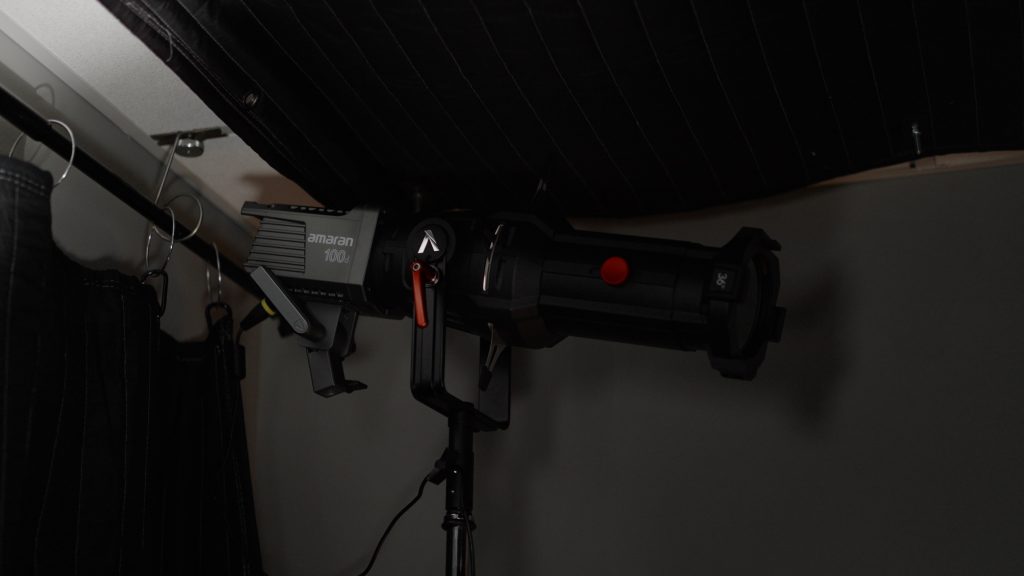
The second light in the background is creating a fake window frame shadows on the far right of the frame. This is done with an Amaran 100D shooting through an Aputure Spotlight Mount and this window Gobo frame I bought. The Spotlight mount (video review here) is fantastic but there are other alternatives like this option, this and this if you’re trying to create a similar effect. If you have enough room you could even just fire a light through a foam cutout of a window and that would do the trick too!
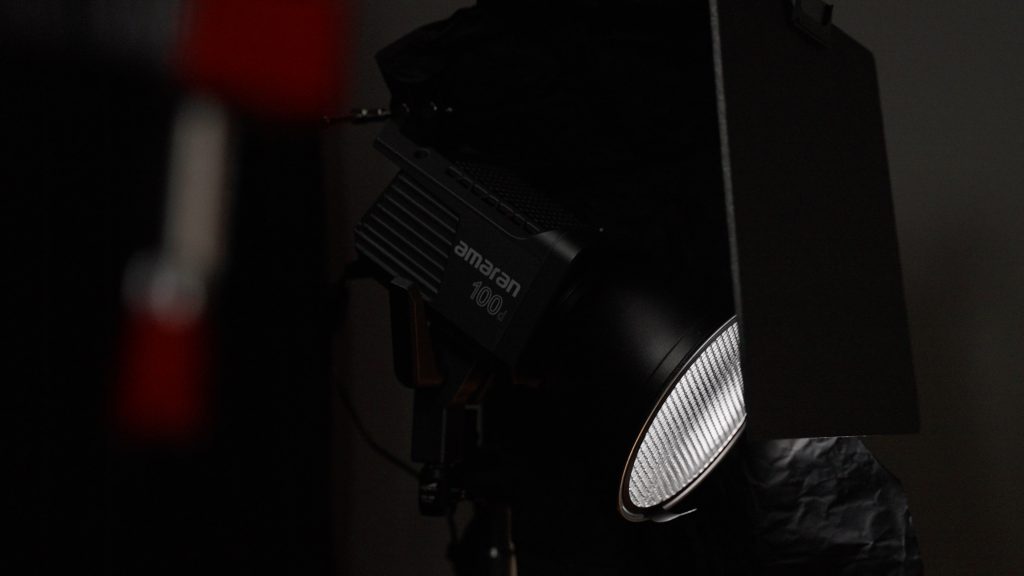
The third background light is another Amaran 100D just lighting the floor as it was really dark back there and I wanted to have the light come from the same direction as the other fake window lights to help sell the entire look on camera.
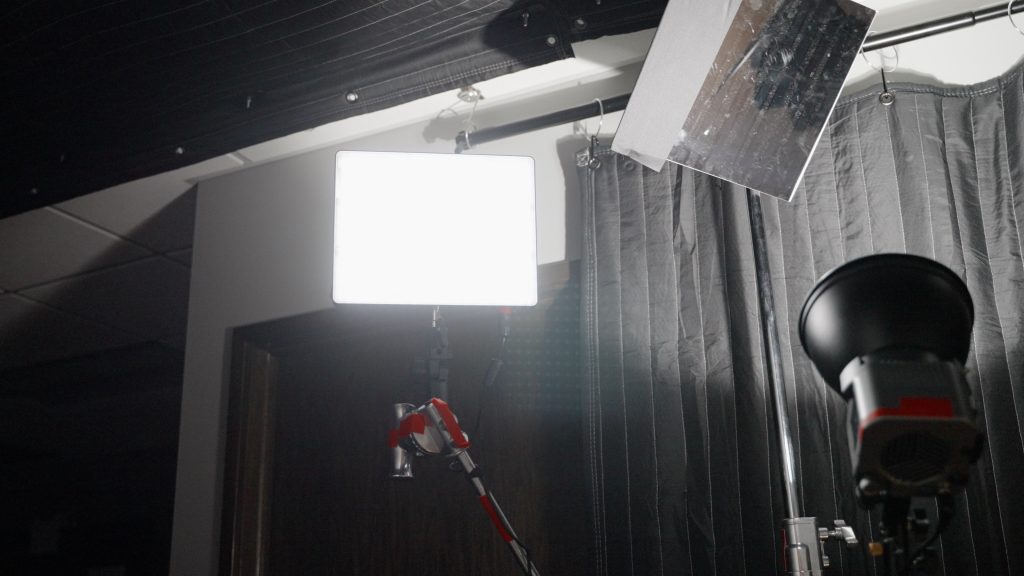
The fourth and final background light is an Amaran 60c (Amaran 60x would also work) and it’s job is to bring up the ambient light in the background. Without it, the other lights look a little to hard. This light fills in the scene a little more and reduces the over all contrast of the lighting setup. You can watch my review of the Amaran 60c here.
The last light is a simple practical lamp in the background. I used a floor lamp and Aputure B7c bulb to add a bit of interest and color contrast to the shot.
If I were starting over on a budget with this setup, I would honestly just use all Amaran 100D and Amaran 60D lights for the background and maybe a Amaran 100X for the key light. Those little suckers are really bright and would work just find for most setups.
Light Rigging
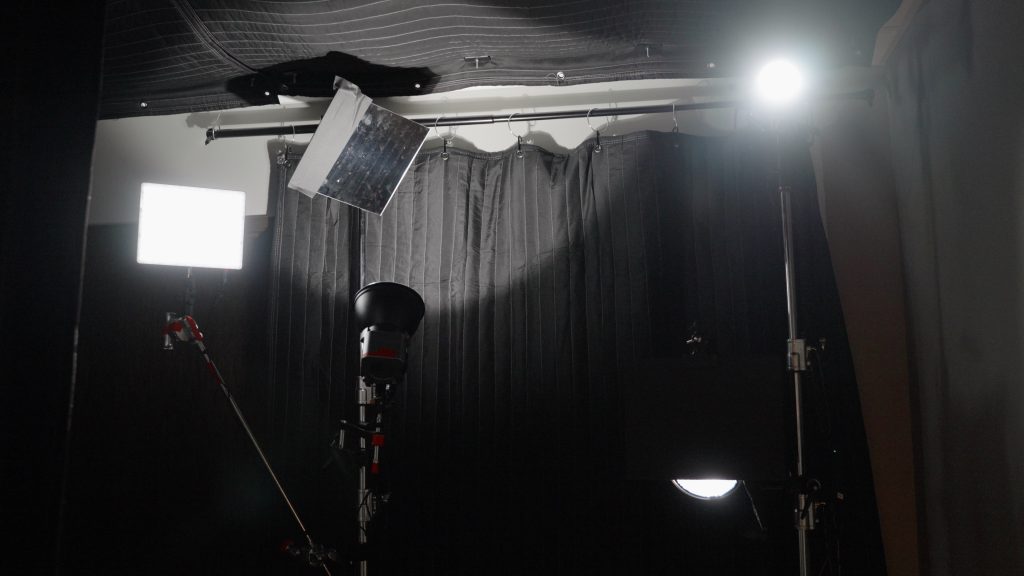
To mount all of these lights you could simply use light stands for each light but this may get a little messy. For my background lights, I used a combination of two C-Stands. One for the Aputure Spotlight and floor light, the other for the mirror, mirror light and ambient light. See the image below to see the final setup.
I won’t go into every little grip accessory but here are a few combinations that I would consider if you’re starting from scratch:
- Mount two or three lights on the top of one stand = Double Baby Headers or Triple Baby Headers
- Mount a light/device from the side of a stand = Super Clamp + Impact 6″ Extension Arm
- Boom an Arm from the middle of a stand = Grip Head Super Clamp + Grip Arm (20 or 40 inch)
Light Control
To control the lights I have two options. The first is the SidusLink app which can be used with all of the above lights to control everything from a phone or tablet. The second and more simple method is to just use a power strip to toggle the lights on and off.
And that finally wraps up the project. Like my “Ultimate Video Desk” and other builds, I hope a few of these ideas help you in building or improving your own setup. Thanks again for watching/reading and stay tuned for more DIY video projects!