Want your videos to look more like Hollywood films? Me too! This guide shows you how I built a rig to give me a more cinematic handheld look.
UPDATE: I’ve recently finished my custom shoulder rig which builds off of the setup talked about in this article. You can find the new post and video here.
I’ve been shooting video for about 11 years now and finally decided to come up with the ultimate camera rig for small to medium camera systems.
Why? I believe a stable sensor is one of the biggest factors in getting the “film look” we all chase after with smaller prosumer cameras.
I think there is a reason you don’t see dinky DSLR/Mirrorless camera systems in use on big sets. Cinematographers don’t dig jittery video.
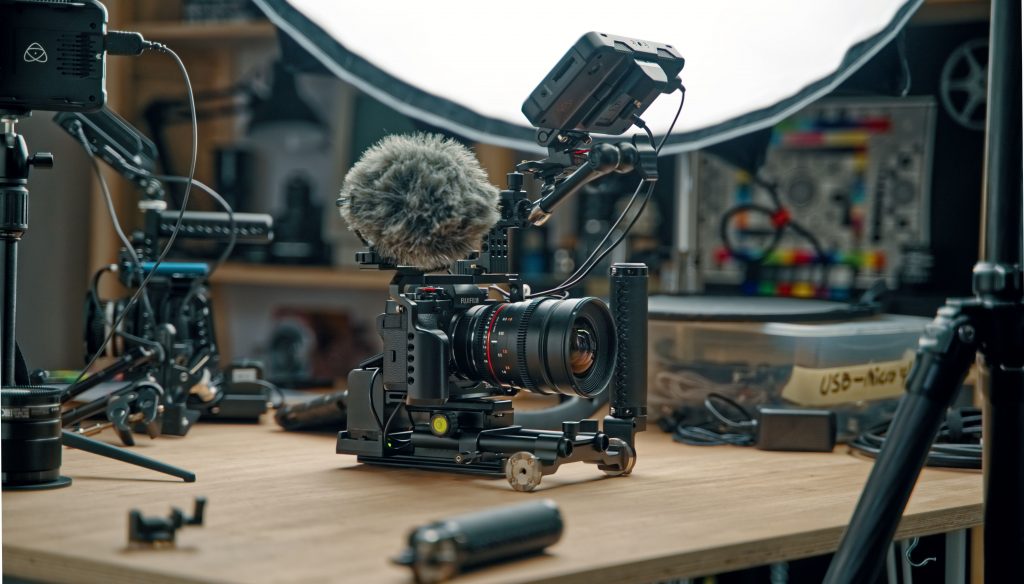
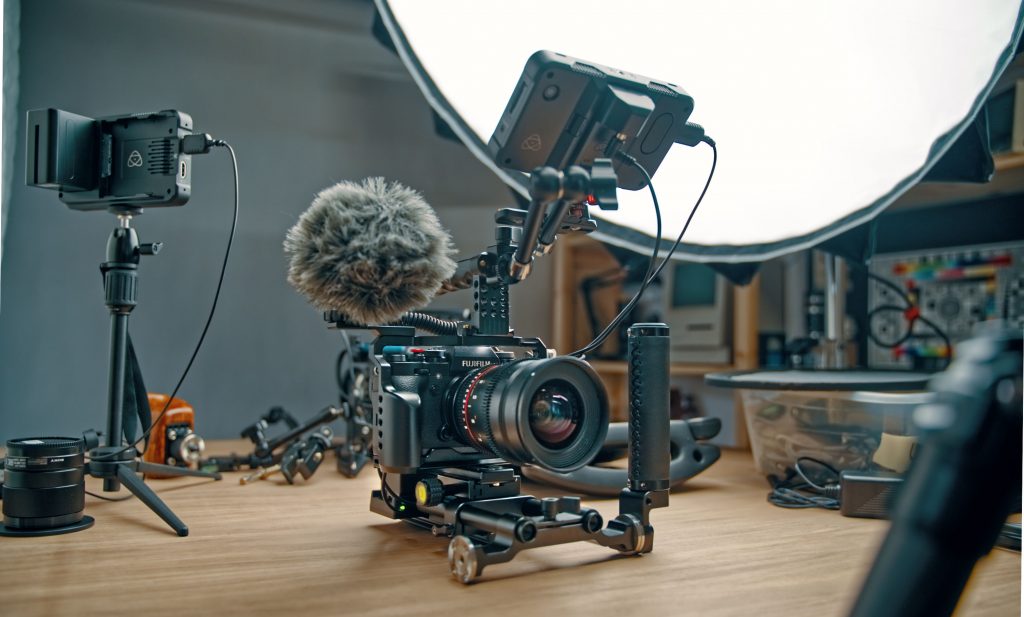
Over the past few weeks I’ve slowly put together what I think is the ultimate cinema rig for small to medium camera systems all while remaining on a budget of under $1000. We are going to focus on half of my final setup in this post. I call this first rig setup the “core rig” and in a future article we will take a look at a shoulder rig that works beautifully with today’s rig.
Before we go any further, I want to offer an affiliate disclaimer:
We are a participant in the Amazon Services LLC Associates Program, an affiliate advertising program designed to provide a means for us to earn fees by linking to Amazon.com and affiliated sites. Many of the links below are affiliated and will be denoted as “on Amazon” next to the link.
Finally, no gear was supplied to me for this video/article and no one has paid to have this content made. All gear was purchase by myself to build this rig.
Goals for the Rig
Before we start talking about parts and building the rig, I want to go over my goals and purpose for this system.
1. Stability
I wanted something that could take a small camera with a large sensor and stabilize it. Not in a way a gimbal stabilizes, but in a way that only well balanced weight can.
2. Customizability
Having a rig that could be modular was high on my list. My goal was something that could strip down to a camera only setup for gimbals, but also could be configured into a fully functioning shoulder rig.
3. Fast
Nobody likes messing with parts, tools and cables on set. This rig needed to be quickly transformed into whatever the shooter wanted.
4. Affordable
I didn’t want to spend or recommend spending thousands on this rig. The costs for video gear have come down so much over the last 5 years and I wanted to take advantage of well made but affordable parts.
5. Camera Agnostic
This rig needed to work with any small camera system. I didn’t want to build something that would only work with a GH5. I’m very happy to say the final result will work with pretty much any DSLR or mirrorless system out today.
The Core Rig
We will be getting to a shoulder rig setup in a future post but for now, I want to focus on what I call the core rig. This is a handheld rig configuration that can be easily mounted to a tripod and customized heavily with a few modules. Without further ado, lets get to our shopping list.
Parts List
Here is a list of everything I used to build the core rig. As of this writing, the core rig cost me about $370 to build (excluding camera, monitor and batteries). If you add every optional accessory to the setup you’re looking at spending about $530 (excluding camera, monitor and batteries). These numbers are of course dependent on the cage you go with etc.
Camera cage
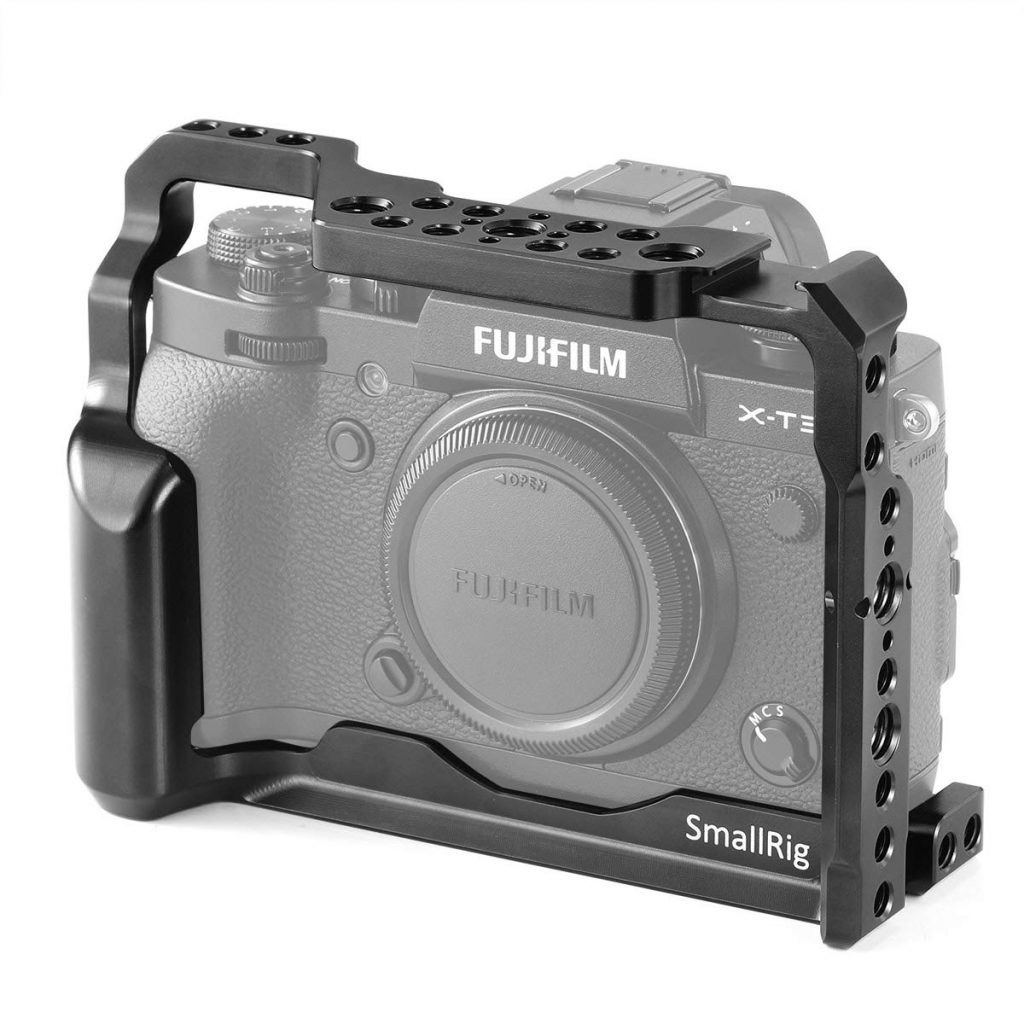
I would recommend SmallRig cages on Amazon as they are affordable and well designed. You can usually find them for $40 to $100 depending on your camera. I buy mine from Amazon but you can also buy them directly from SmallRig if you have the patience for oversea shipping times. If you decide to change cameras down the road all you need is a new cage and the rest of the rig can remain unchanged.
NOTE: I would definitely recommend the custom fitted cages. There are some universal cages out there, but I’ve found them to be too bulky. Get one specifically designed for your camera model. The fit will be much better than those universal options.
Nato Rails (2x)
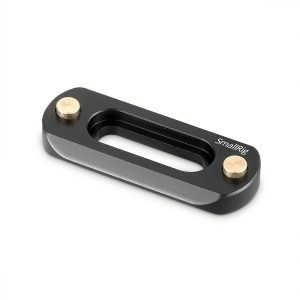
We will need two of these for quickly adding and removing parts on set. You can buy the nato rails I used here on Amazon.
NOTE! You only need one of these if you’re camera cage has a Nato rail built in. Many of SmallRig’s newest cages have this design saving you a few bucks.
Nato Top Handle
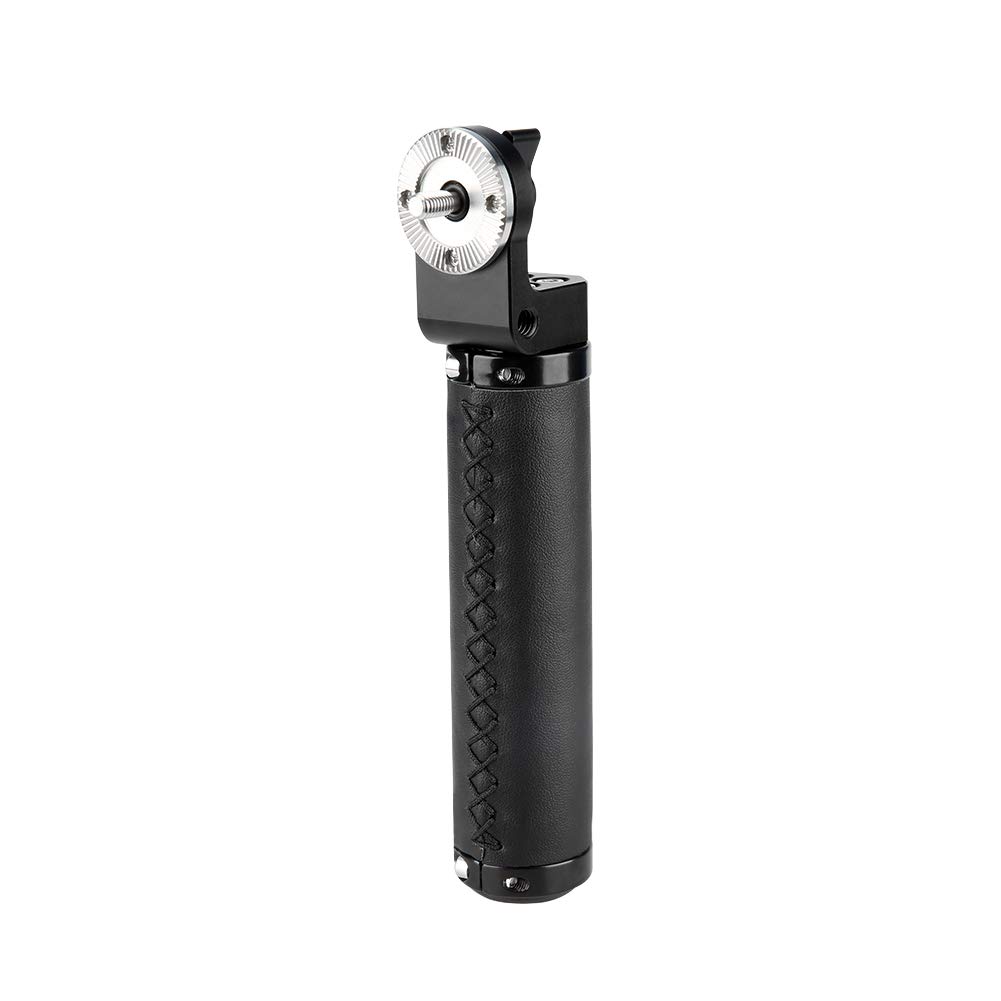
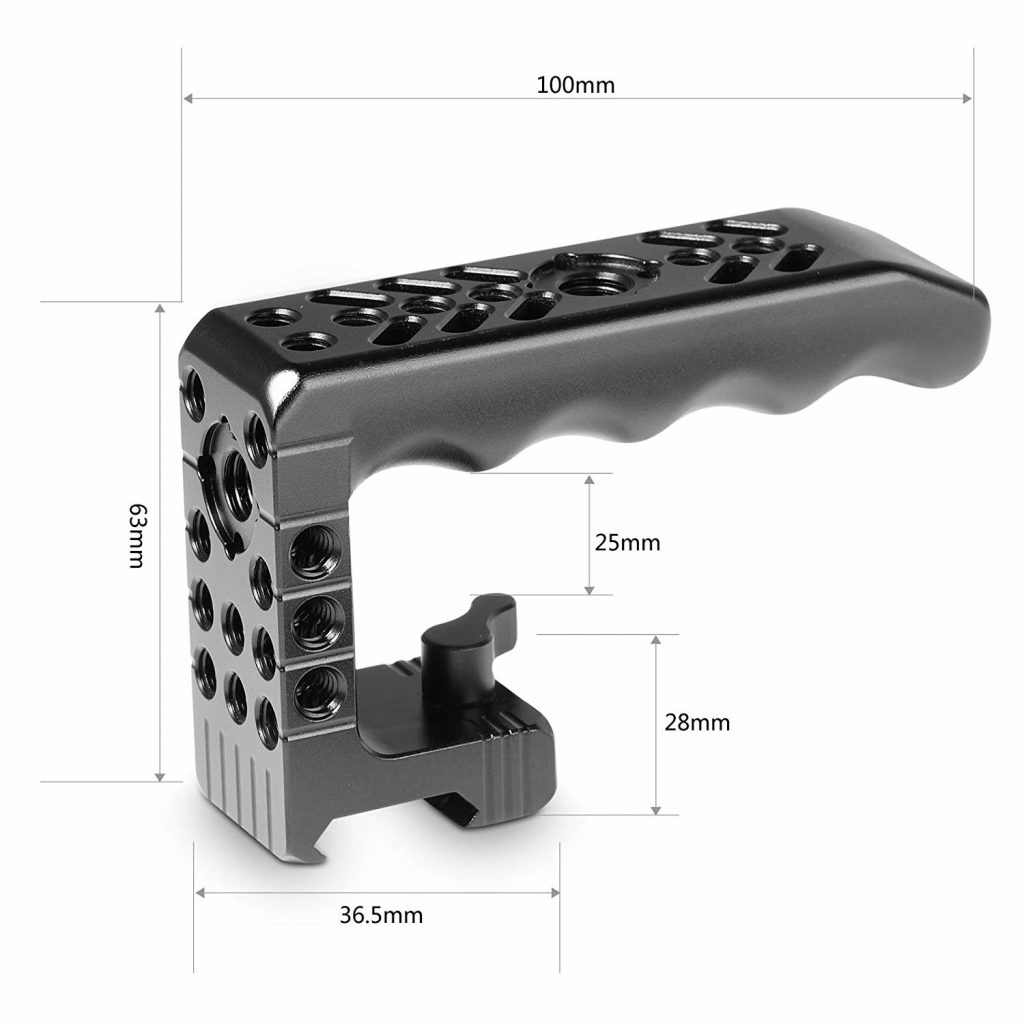
There are tons of these on Amazon and you can go with any model you like. I would recommend you get a top handle that is nato friendly and has 1/4 20″ taps on the front near the top for mounting our nato rail. There are two models I really like. The first, is this compact version on Amazon and is by far my favorite. It was designed for RED cameras so it’ll cost you a little more.
The secondly option is this rotating nato handle on Amazon. This is the budget option of the two handles. Not quite as nice but still great.
Nato Monitor Mount
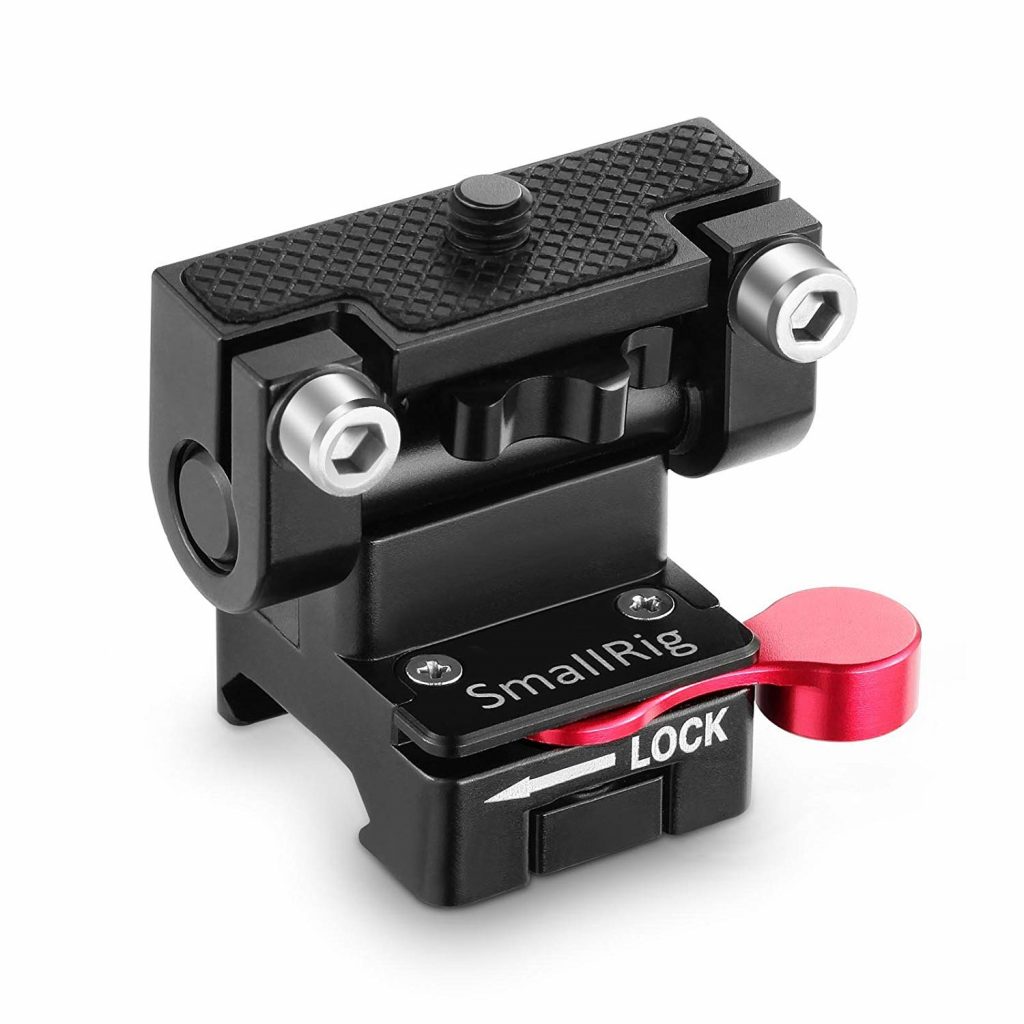
This little clamp will allow you to mount a monitor in several different configurations VERY quickly. It can also be adjusted with one hand while filming with the rig. You can find the SmallRig version here on Amazon.
Arca Swiss Plate for Cage
I use the Arca Swiss plate A LOT on this rig and you’ll see why later. It is a great system that is affordable and widely used. The best option is the Kessler Kwik Plate on Amazon, but you can also pick up a more affordable model here on Amazon. These plates come in many different lengths but I would shoot for something in the middle range.
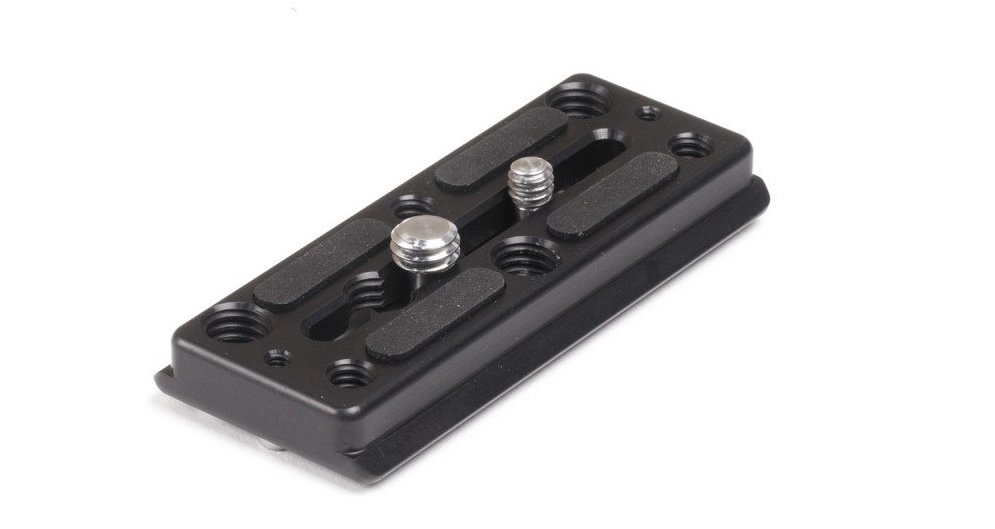
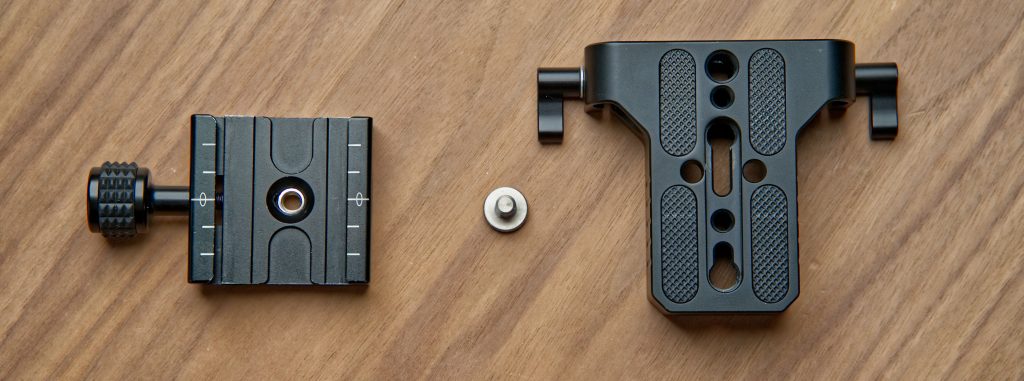
Arca Swiss Clamp
We’ll use this to attach a battery base to the camera cage. You can go with any clamp style but to keep costs down, I used this small clamp on Amazon.

15mm Rod Clamp
This amazing little accessory will be used to add some needed height to our camera system. You can buy it here on Amazon.
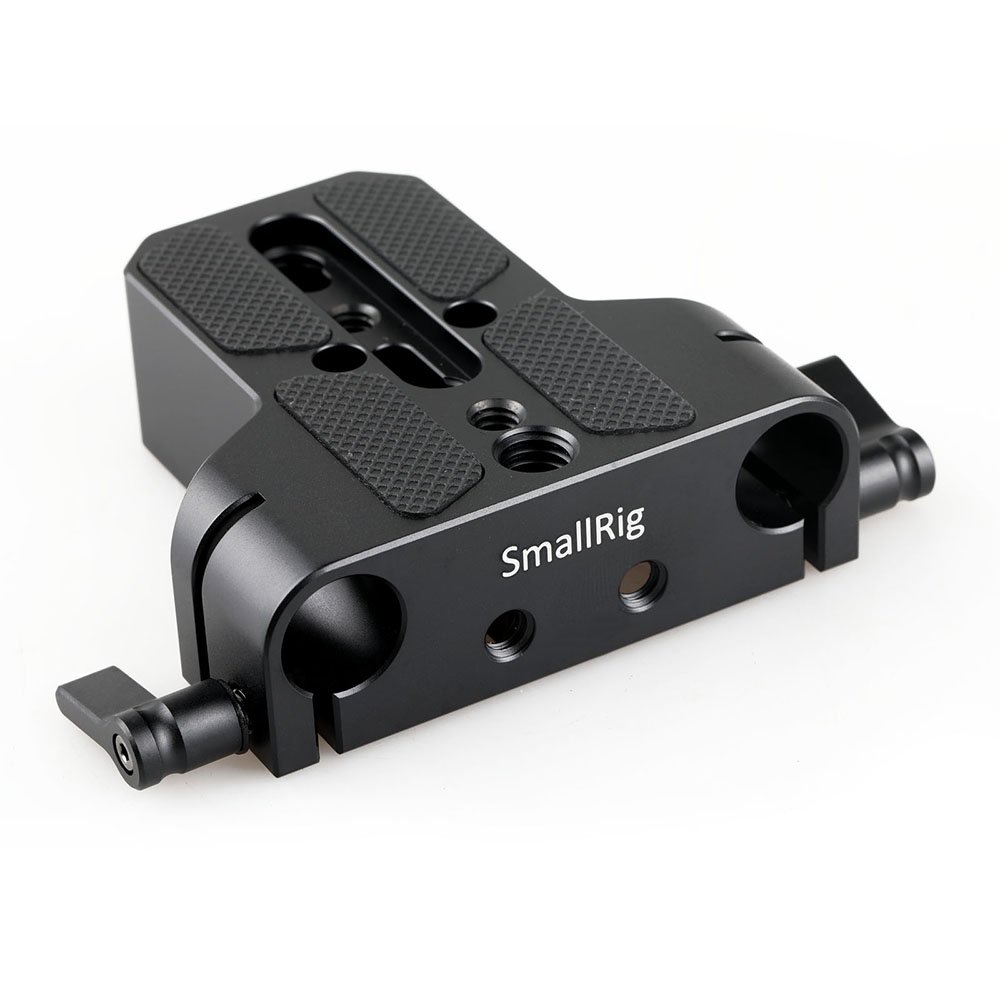
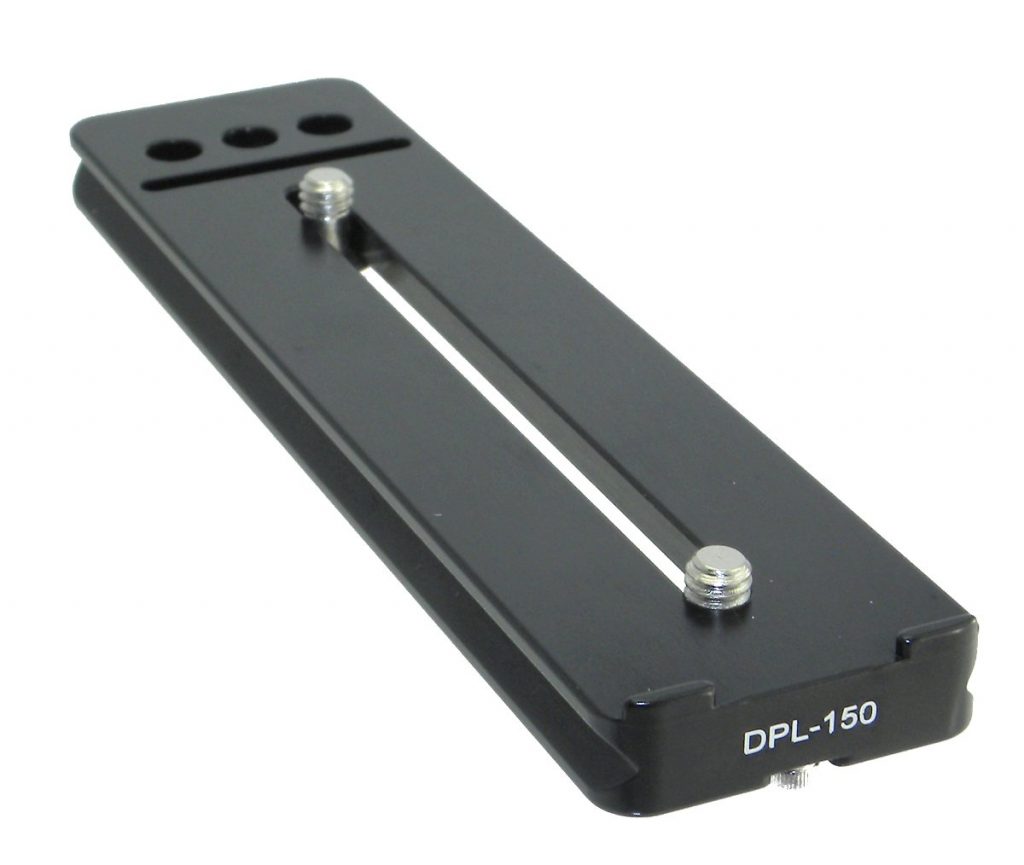
Long Arca Swiss Plate for Rig
Yep. Another Arca Swiss plate. We’ll be using this for an amazing setup here in a bit. I would highly recommend this plate be 150mm long or longer. Here is the model I used on Amazon.
Also make sure this longer plate lets you use several 1/4 20″ screws. This is critical for our build.
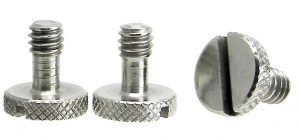
Tripod Screws (optional)
It would be a good idea to pickup 3 or more of these. Here is a pack on Amazon.
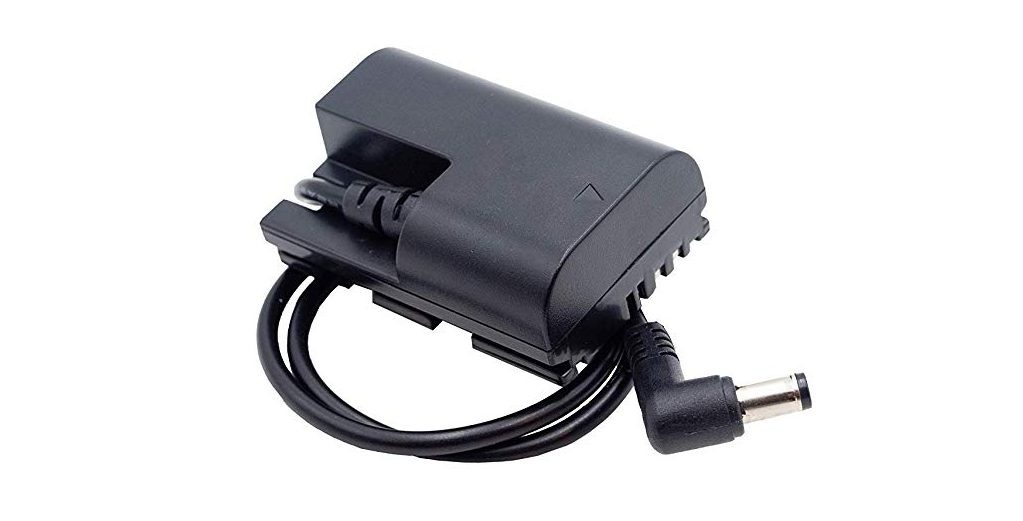
Battery Adapter
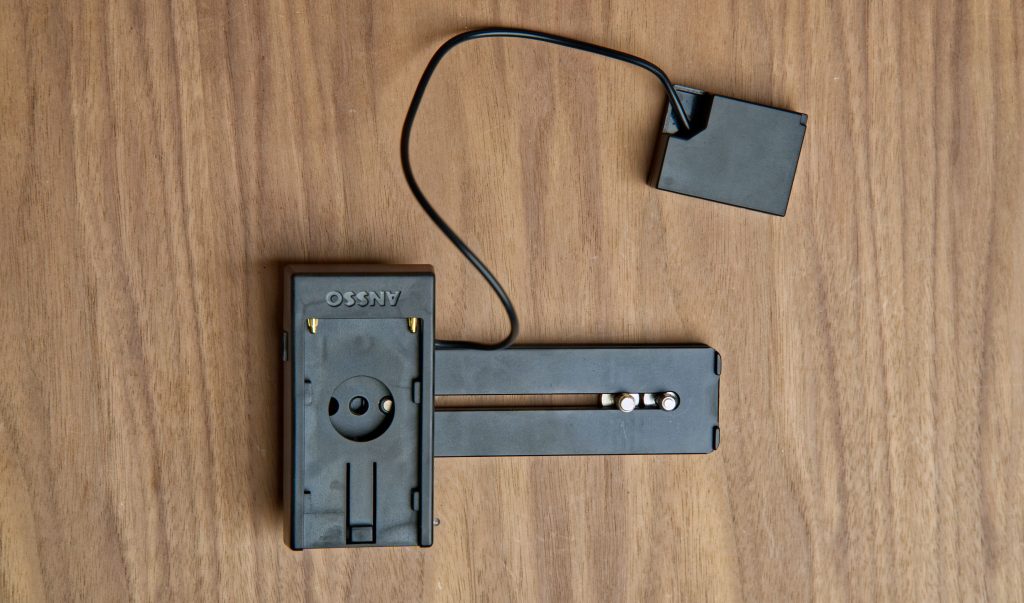
This NP-F battery adapter will not only give us more power, but it will also give us more weight (which we want) and the ability to power a second device. I use the Ansso adapters but you can also find these under the names Fotga, DRRI, Runshuangyu and other names. A simple search for NP-F Battery Adapter on Amazon will bring up several options. Here is a list of options I’ve found for different cameras:
- Canon LP-E6 adapter on Amazon
- Sony FZ100 Adapter on Amazon
- Sony FW50 adapter on Amazon
- BMPCC 4K adapter on Amazon
- Fujifilm W126 adapter on Amazon
- Panasonic GH Adapter on Amazon
- Universal adapter on Amazon – This model will just give you a DC cable letting you use any battery coupler or “dummy battery” adapter for any camera.
I should mention that you could use the new “Power Junkie” by Blind spot, but this device only has a single DC output. You could get a DC splitter to combat this, but that won’t be as elegant as the previously mentioned options. The Power Junkie is available on Amazon.

Battery Coupler (Optional)
If you can’t find an NP-F battery plate for your camera, just get the universal adapter I mention above. Next, grab a battery coupler form the list below. Just make sure your battery coupler has the correct plug on the end. A female or male 5.5mm x 2.5mm plug. Just search for “your-camera-model battery coupler. Or “your-camera-model dummy battery” on Amazon. If the coupler or dummy battery you found doesn’t have the right male or female cable ends, you can get a dc cable adapter (male to male or female to female).
Cable Clamps
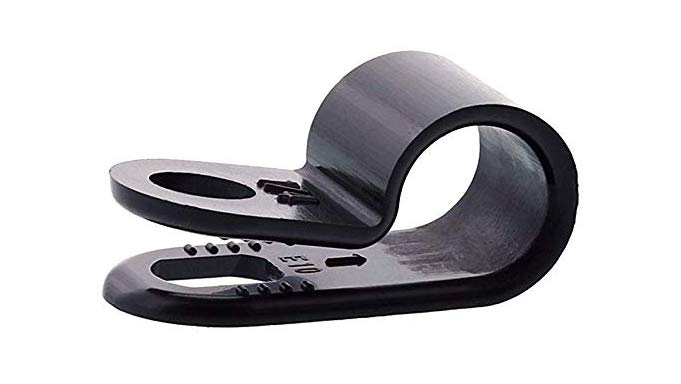
These little suckers will save our lives from a nightmare of cables here in a bit. They are so handy for other uses too! We’ll only be using one, but they come in packs of 100 here on Amazon. We’ll be screwing one of these to our cage.
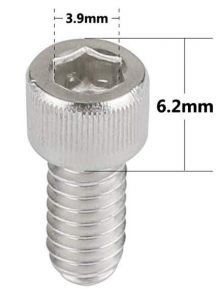
NOTE: 1/4″ will work, but for thicker cables I would go with the 3/8″ version (what I’m using). I would also use a 1/4 20″ bolt to mount this. The type with the tall head works best (available on Amazon image below).
Extra Screws
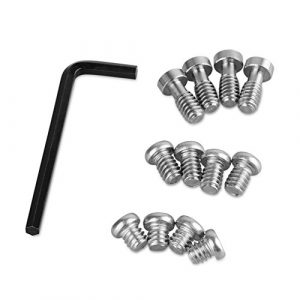
You’ll probably need some of these! There is a handy pack from SmallRig on Amazon.
HDMI Cable
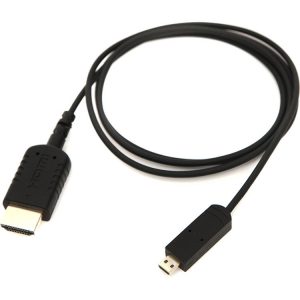
You’ll need an HDMI cable for your monitor. I’d recommend one that is 2 feet long. For Micro HDMI to full HDMI, I would get the SmallHD Focus cable here on B&H. For full HDMI to full HDMI, you can use just about anything.
HDMI Cable Lock (optional)
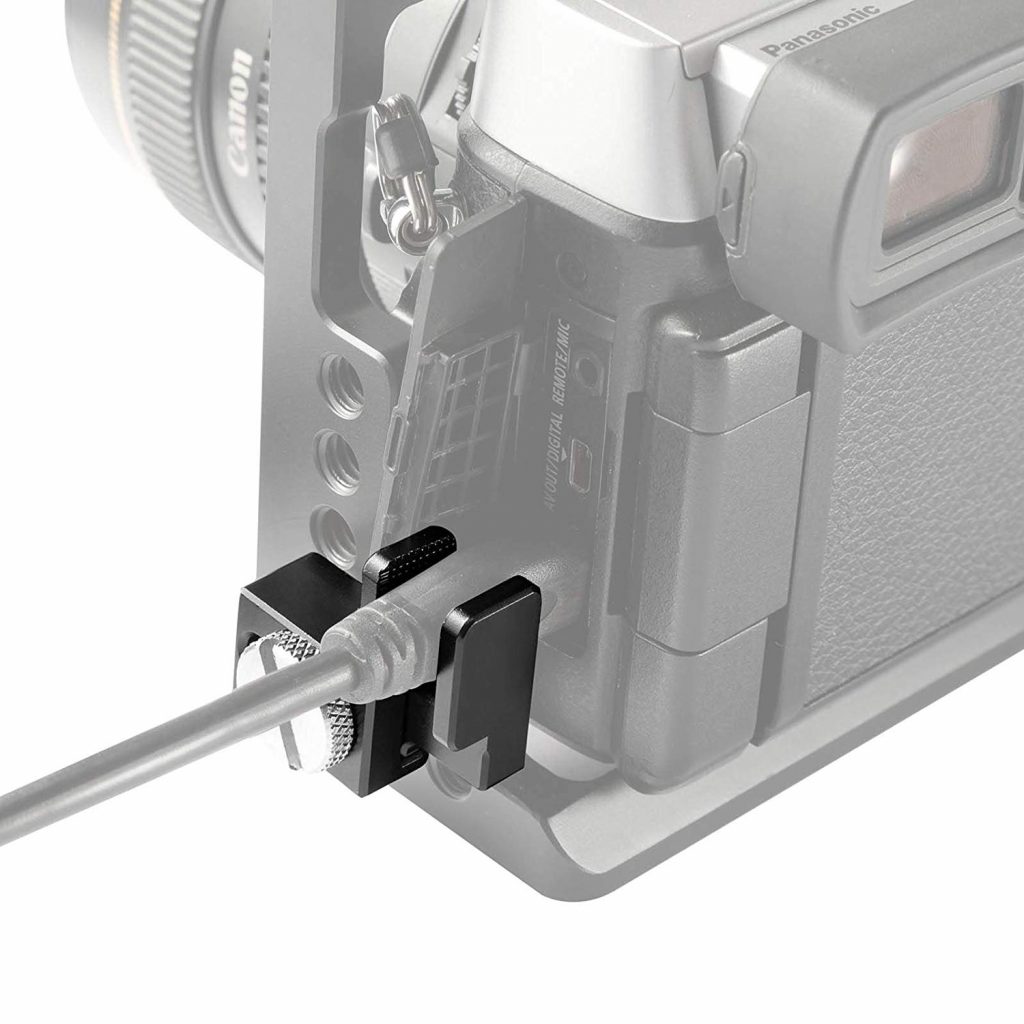
I’d highly recommend a cable lock for your camera cage. You can do a little research to figure out which one you need for your SmallRig cage. These can often be purchase with your camera cage.
NP-F Coupler (optional)
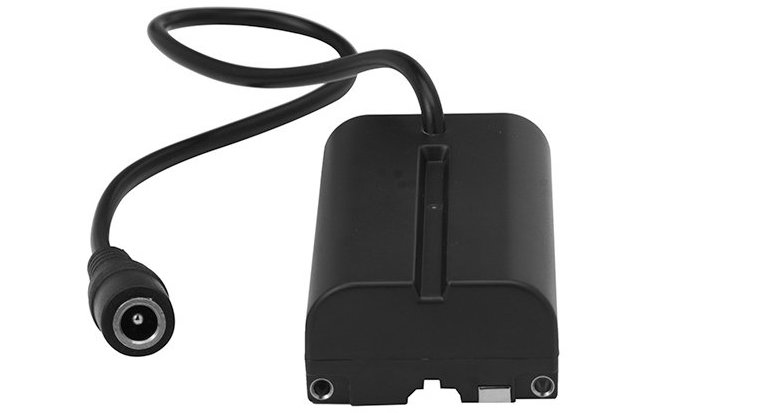
If you’re using a monitor that doesn’t have a DC 7.2v or 8.4v input, you will probably need one of these couplers. This will allow us to use our battery adapter to power BOTH the camera and a monitor. Here is an adapter option on Amazon.
DC Cable for Monitor
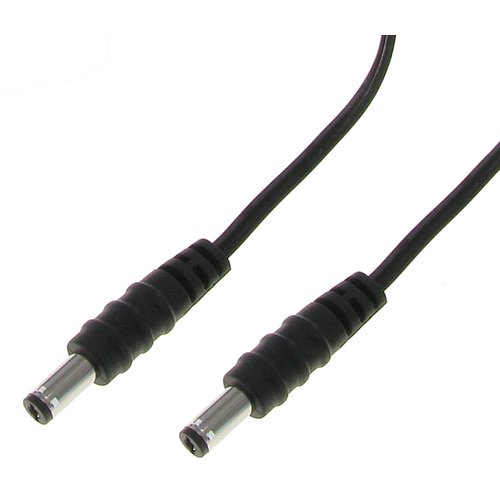
We need to get a DC cable that will run from our battery adapter to our monitor. Anything that has a 5.5mm x 2.5mm male plug (both ends) should work. I’d recommend getting a few different lengths and angles to make sure you’re covered. My favorite length is about 3 feet. Here are a few options on Amazon. And you can find the cable I used here on Amazon.
Other Accessories
At this point you have everything you need to start building the core rig. That said, here are a few extras that will take your core rig to the next level. If you are going to be building the shoulder rig I’ll be talking about in a future post, the first three accessories here are a must.
Friction Monitor Arm
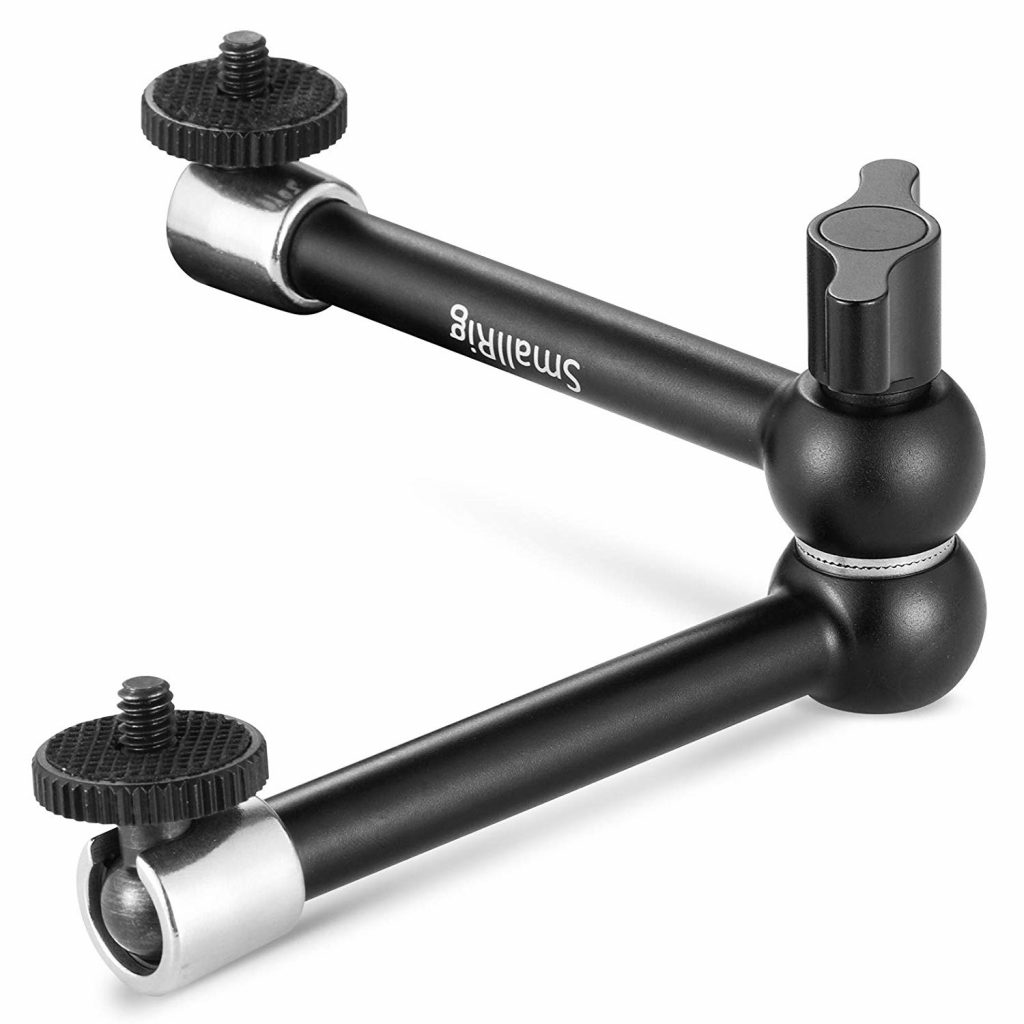
This baby will allow us to position our monitor arm in any orientation. I would consider this a must if you will be using this rig on a tripod. I used the SmallRig 11″ arm from Amazon.
Nato Clamp for Fiction Arm
This will let us quickly remove the arm if needed. There are several models available, but I went with this unit on Amazon.

Nato Rail for Friction Arm
This little rail will give us the ability to mount our monitor nato clamp to our friction arm. You can pick up the rail I used here on Amazon.

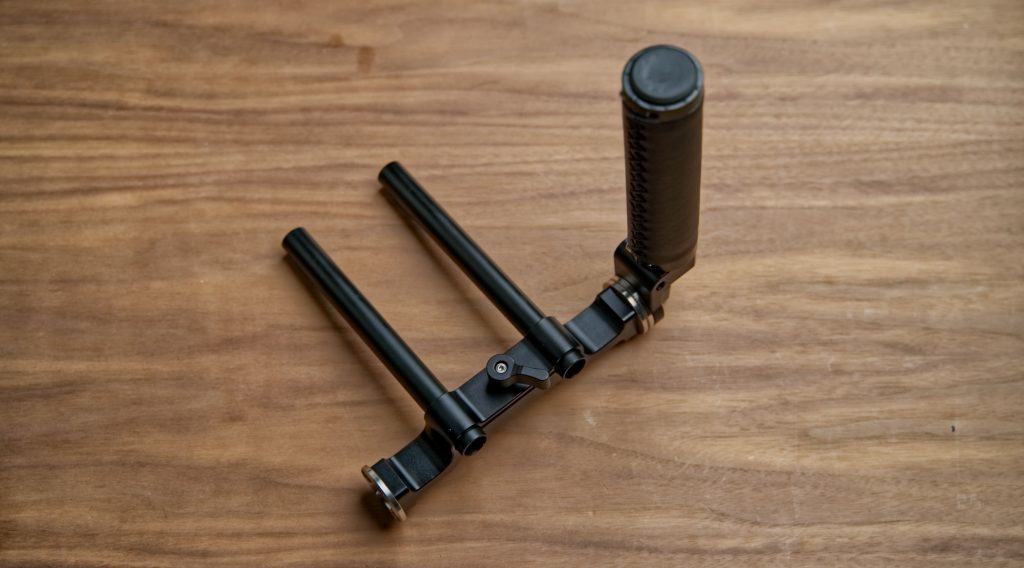
Left Side Handle
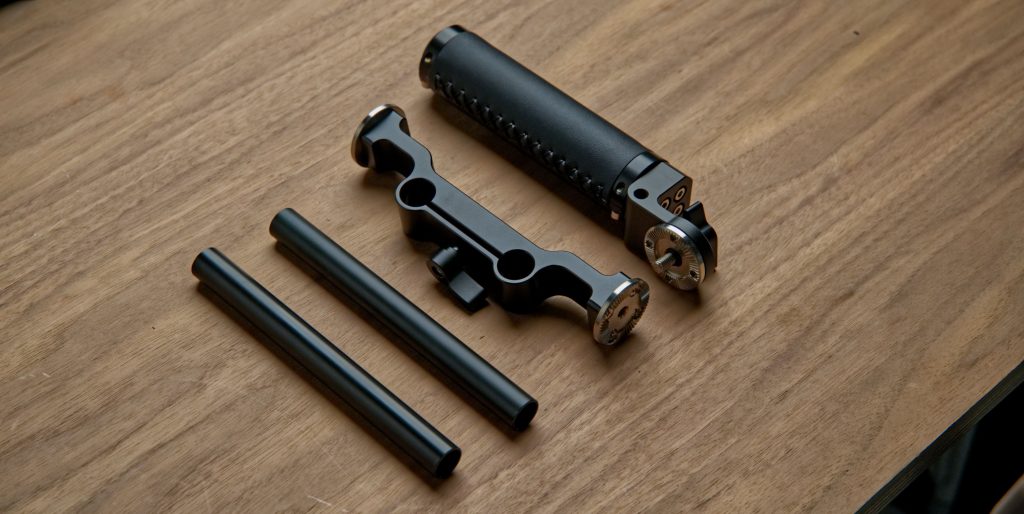
On my core rig, I’ve added a side handle to the left of the lens giving me a very rigid dual hand grip setup. This is great when you need a rock solid grip on your camera and are either using auto focus or just filming a fixed focus show with side to side movement. Your right hand remains on the camera grip while your left hand comfortably holds this left sided handle. I’ve positioned the left handle in a way that doesn’t interfere with the lenses focus ring, so you can still shift your hand to change focus. This extra handle setup can be slid onto the rig via the 15mm rode clamp we’ve already setup.
Here are the parts you need for this additional module:
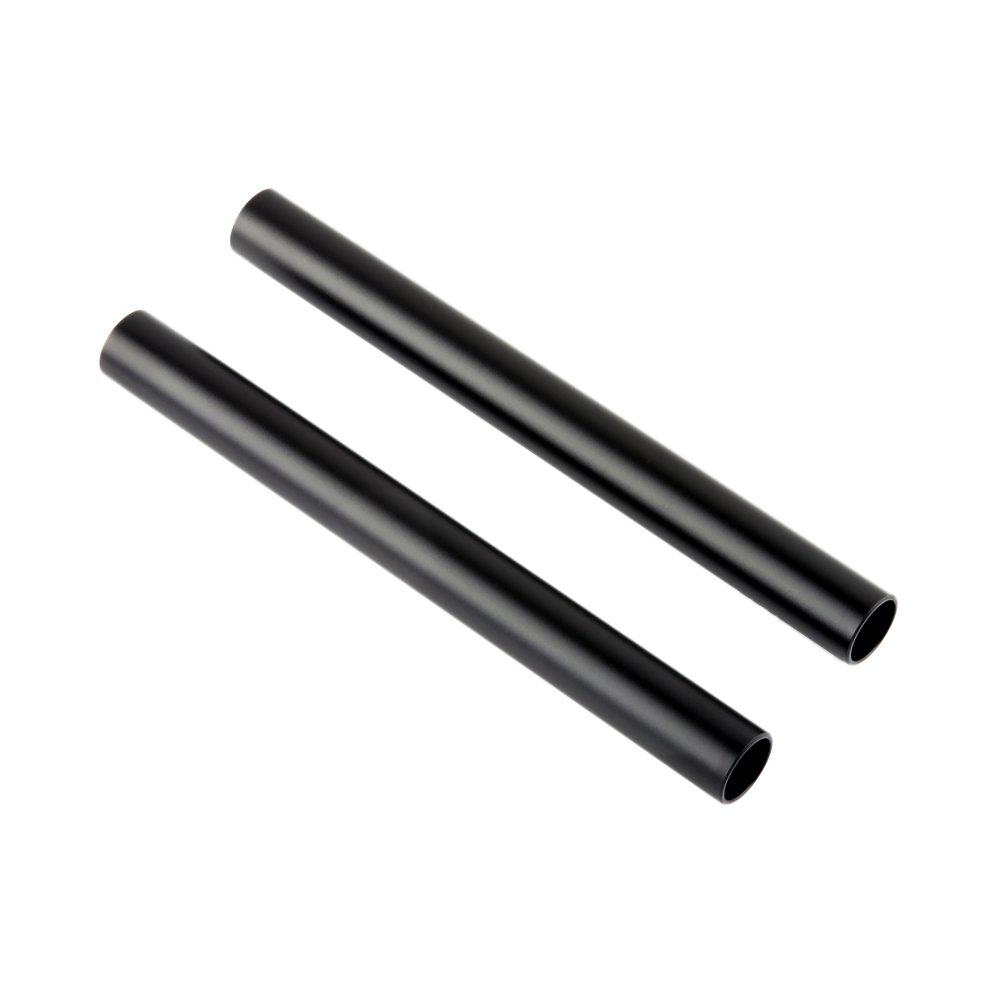
- 6 inch 15mm rods on Amazon
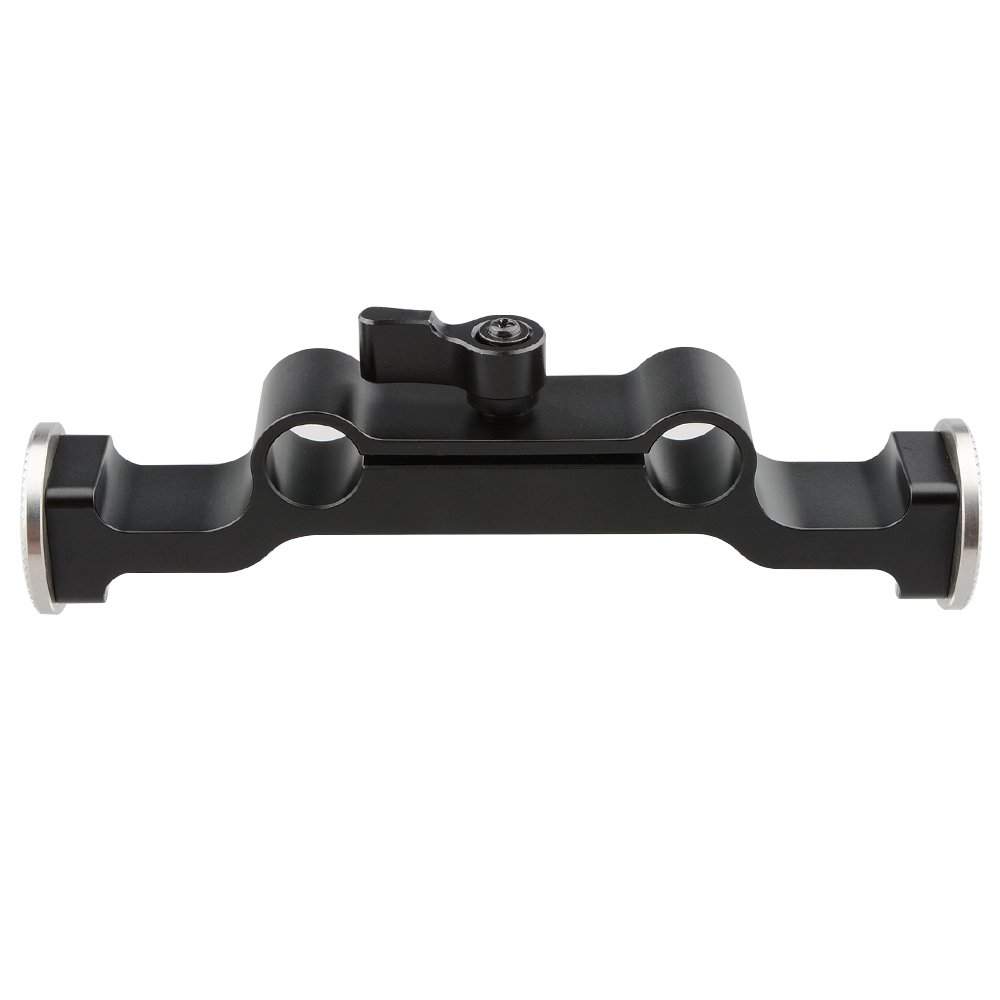
- Rosette Clamp on Amazon
- Rosette Handle on Amazon
Even though we are using a single handle, I’ve opted for a 15mm rosette clamp that has two rosette mounting points. This makes the setup incredibly rigid. We don’t want our handle to slip on the 15mm rod. I’ve also gone with the above rosette clamp because it moves the rosette handle further away from the lens to give us more room to work with focus.
Eyebrow Flag
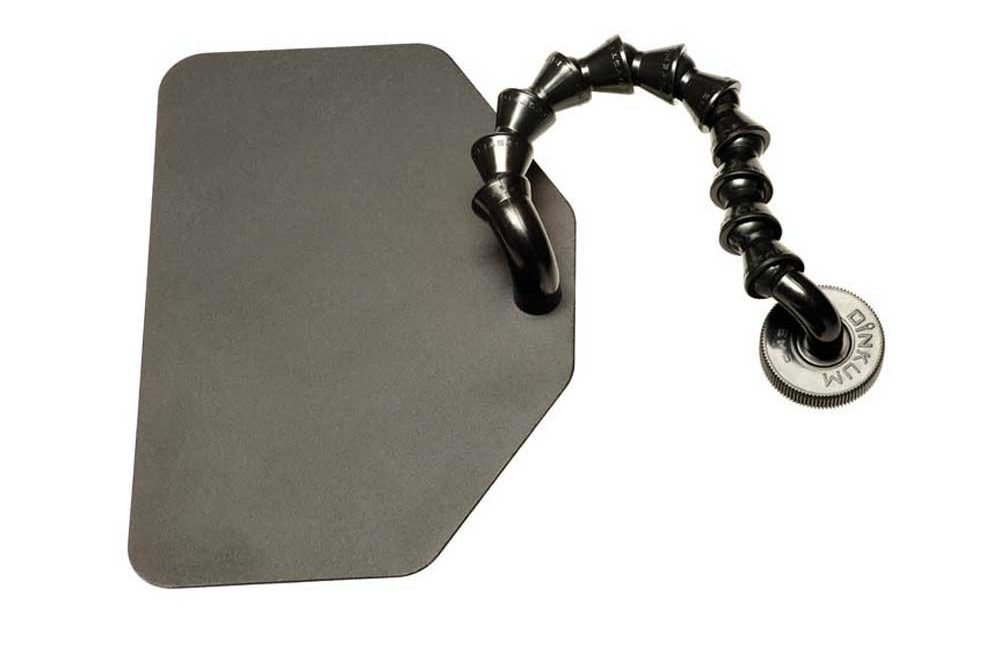
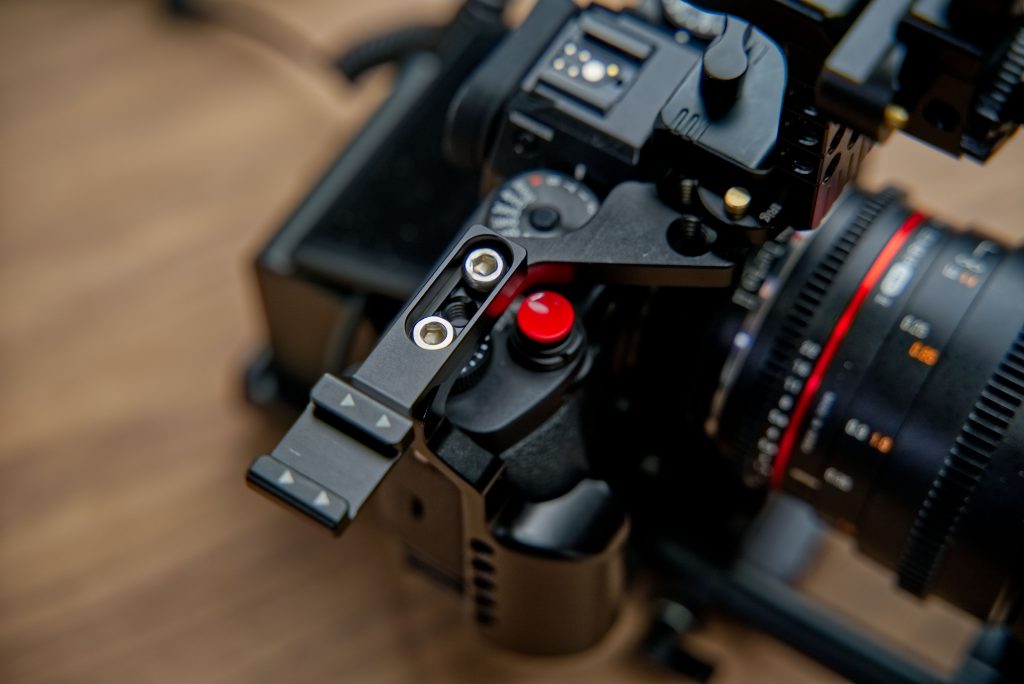
Another accessory you might consider is this Dinkum Systems Compact Lens Shade (Amazon link but also available on B&H). This is a great tool if you are not going to be using a matte box. I’ve mounted mine on the built in cold shoe on my cage. If you don’t have a cold shoe available, you can add one easily using one of these cold shoe adapters on Amazon. If the arm for the shade is too long, you can remove the pop out sections to shorten the setup like I’ve done here.
Microphone Mount
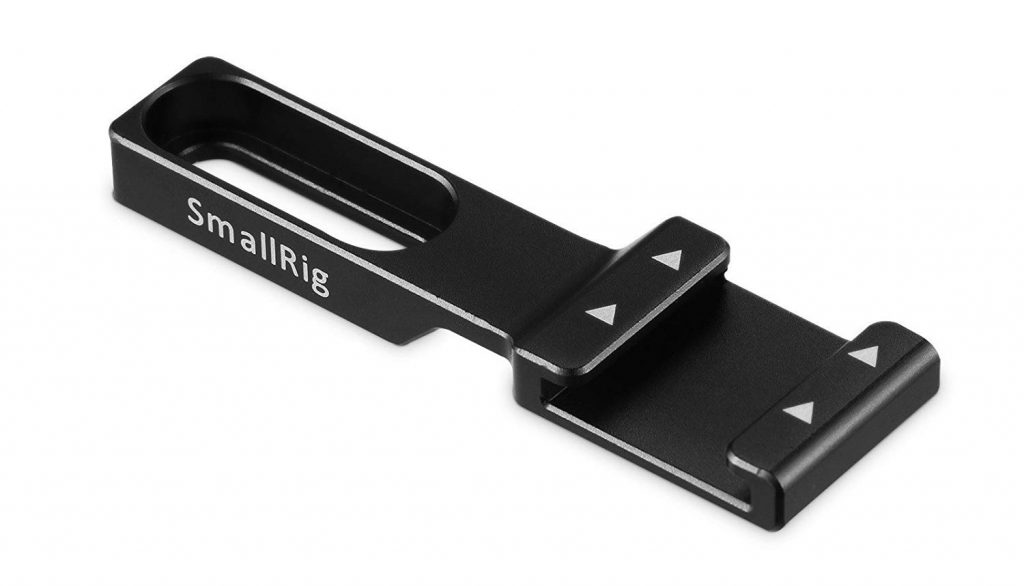
What about audio? If you need a microphone or wireless receiver mounted to the camera, your best bet is to use this Cold Shoe Extension on Amazon. I would mount it on the top right or left side of the cage. This should give you enough room to mount a microphone with a bulky base.
THATS IT!
Building the Core Rig
With everything in hand, we can now start putting together our core rig! Lets start building!
Step 1: Cage
Mount your cage to your camera. Next, add the shorter Arca Swiss plate to the bottom of the camera. If you have an HDMI clamp for your camera/cage, you can add that now.
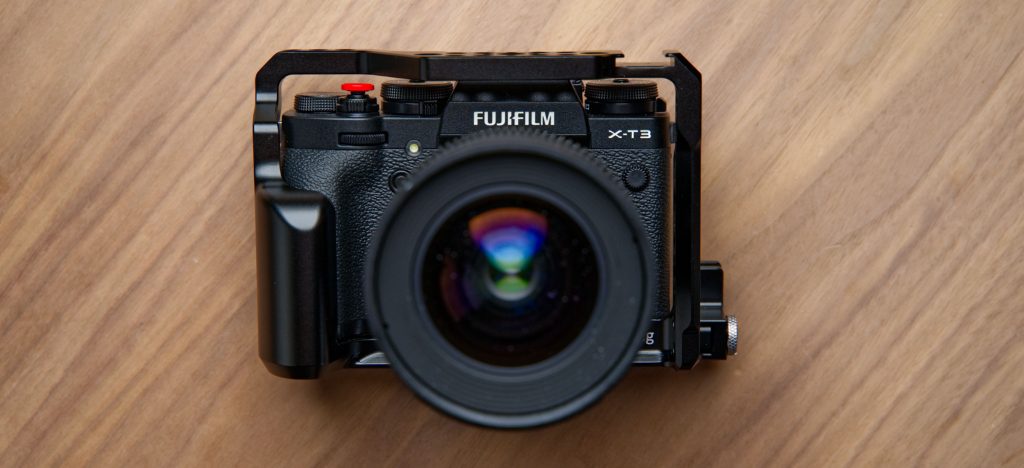
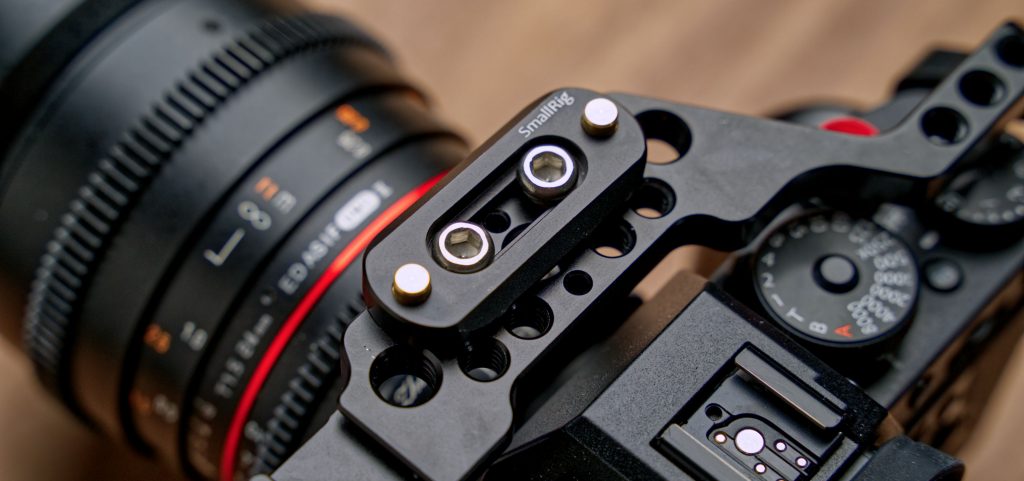
If you’re camera has a nato rail built into the top of the cage move on to step 2. If you’re cage does not have a nato rail built in, add one of them to the top, center portion of the cage near the front.
Next, take your shorter Arca Swiss plate and mount it to the bottom of your camera cage.
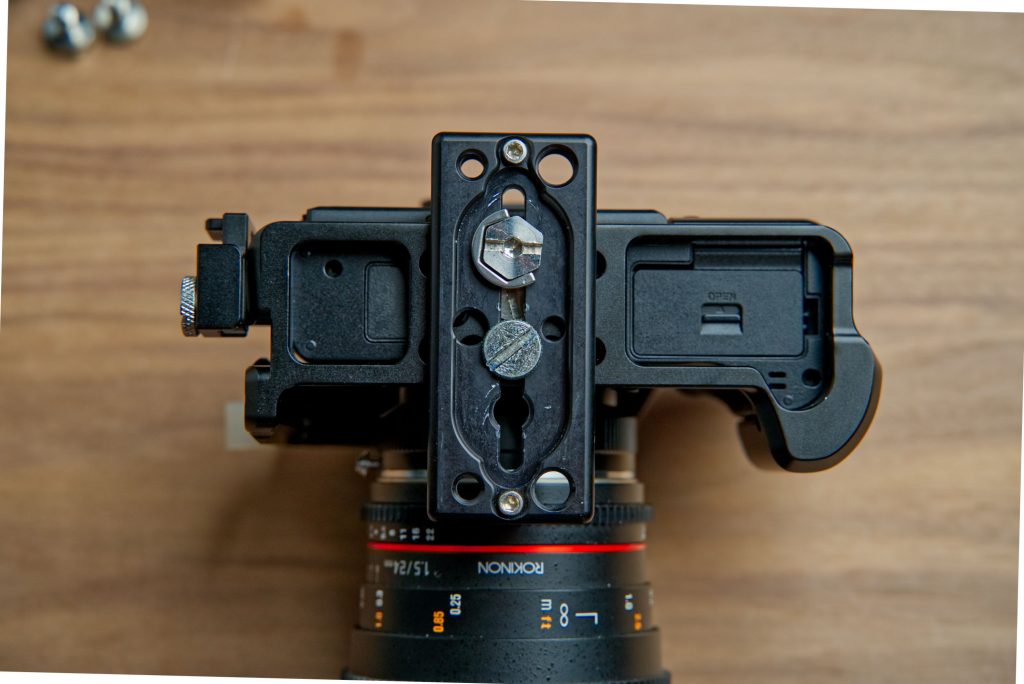
At this point you have a nice tiny setup for use on a gimbal or tripod.
Step 2: Top Handle
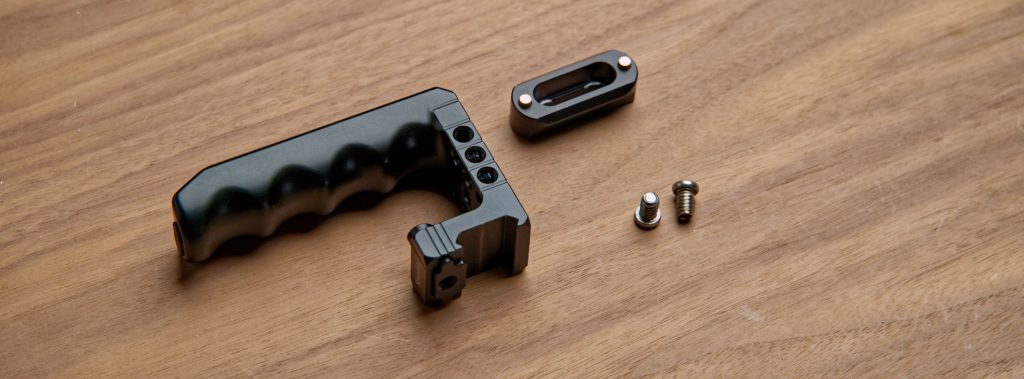
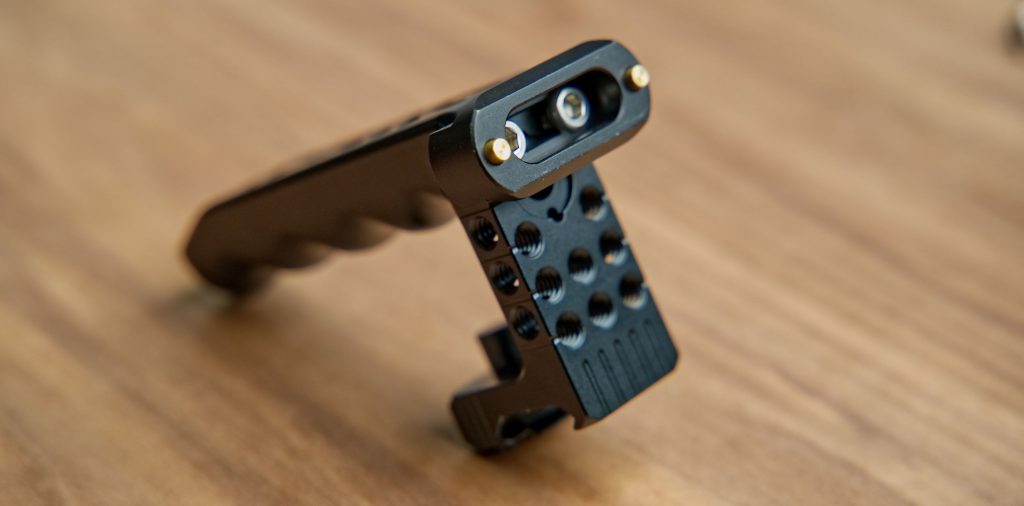
Take your top handle and add a nato rail to the front side. This will allow us to quickly mount other accessories to the top handle.
Step 3: Monitor
Take your monitor nato clamp and mount it to the bottom of your monitor.

At this point we have 4 configurations ready to be used thanks to those nato rails:
- Camera only
- Camera and top handle
- Camera and monitor
- Camera, top handle and monitor
Pretty sweet!
Step 4: Monitor Arm (optional)
Earlier I mentioned a few extra accessories you could purchase to add a monitor arm to this system. If you picked those up, you can add even more flexibility to your core kit.
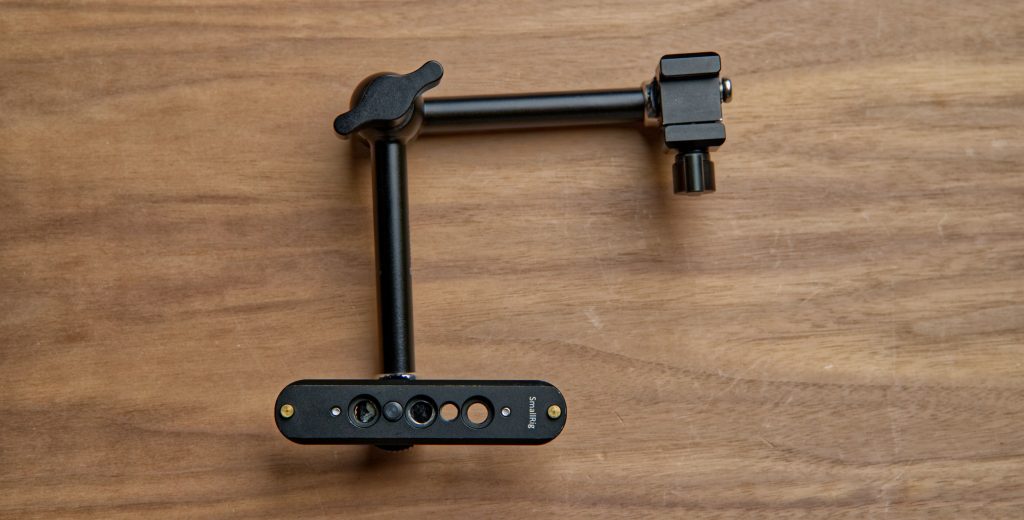
Take your friction monitor arm and add the nato clamp to one end. Many of these nato clamps allow you to add a 1/4 20 screw to lock in the clamp. This will keep the friction arm from loosening on you.

On the other end of the friction arm, mount the nato rail I mentioned (this one from Amazon).
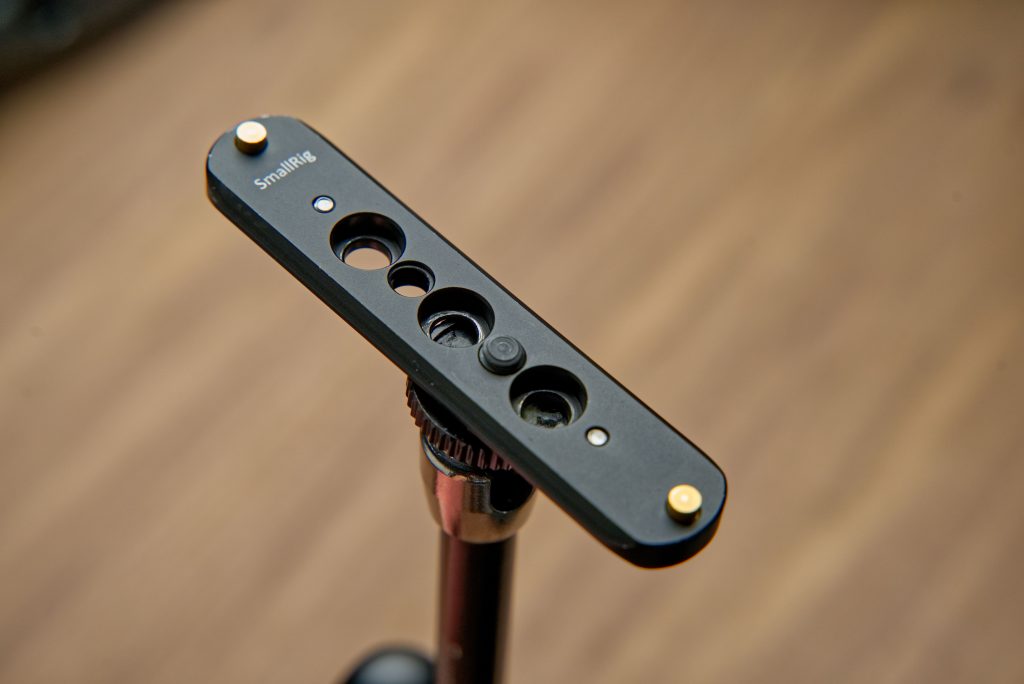
With all that done, you can now use this friction arm module with the rest of your core kit. We’ve just upgraded our previous 4 configurations to 6 total setups!
- Camera only
- Camera and top handle
- Camera and monitor
- Camera, top handle and monitor
- Camera, friction arm and monitor
- Camera, top handle, friction arm and monitor
Step 5: Power Setup
Now we are going to build a module that mounts to the bottom of everything we’ve built so far.
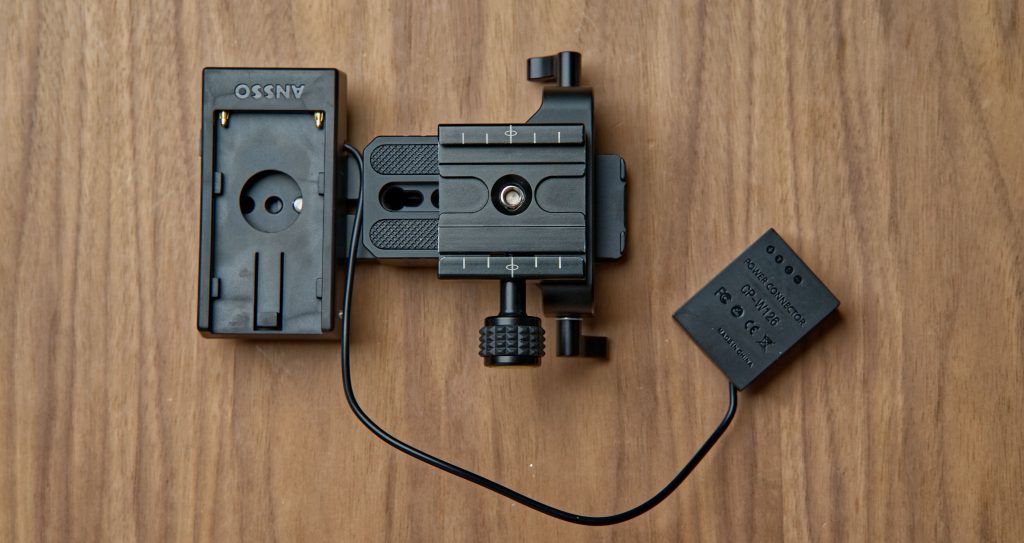
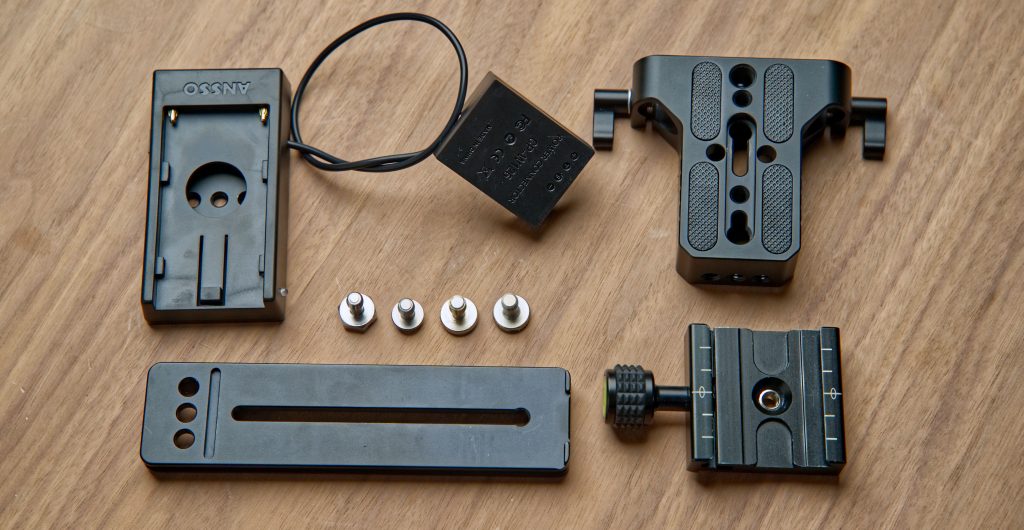
To start, take the long arca swiss plate we bought, and add the NP-F battery adapter to one end. You want this to be roughly flush with the end of the arca swiss plate.
Next, grab the 15mm rod clamp, and add the arca swiss clamp to the top. I mounted the knob on the right, but either can work depending on your setup.

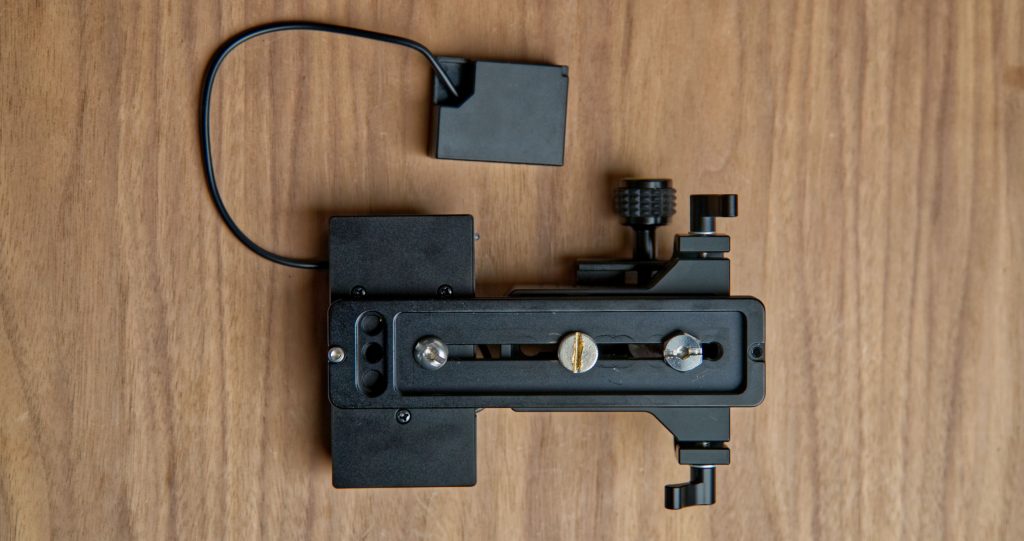
Now we can mount the rod clamp/arca clamp setup to the other end of our long arca-swiss plate. I would recommend leaving about 1/4″ or more in-between the battery plate and the rod clamp. This will insure there is room for the battery cable. I would also recommend using two 1/4 20″ screws to mount this guy so you don’t have any twists.

Step 6: Putting it all together
Now we can take our setup from step 3/4 and mount it to our new power base. Connect your dummy battery to the camera and the power DC cable to your monitor. At this point, we have 3 to 4 modules that we can combine to create up to 13 different configurations! These modules include:
- Camera (camera and cage)
- Top handle
- Monitor
- Friction Arm (optional)
- Power base
If you’ve picked up the left side handle parts, lens shade and microphone cold shoe mount, you can now add those accessories as well.
Step 7: Cable Management
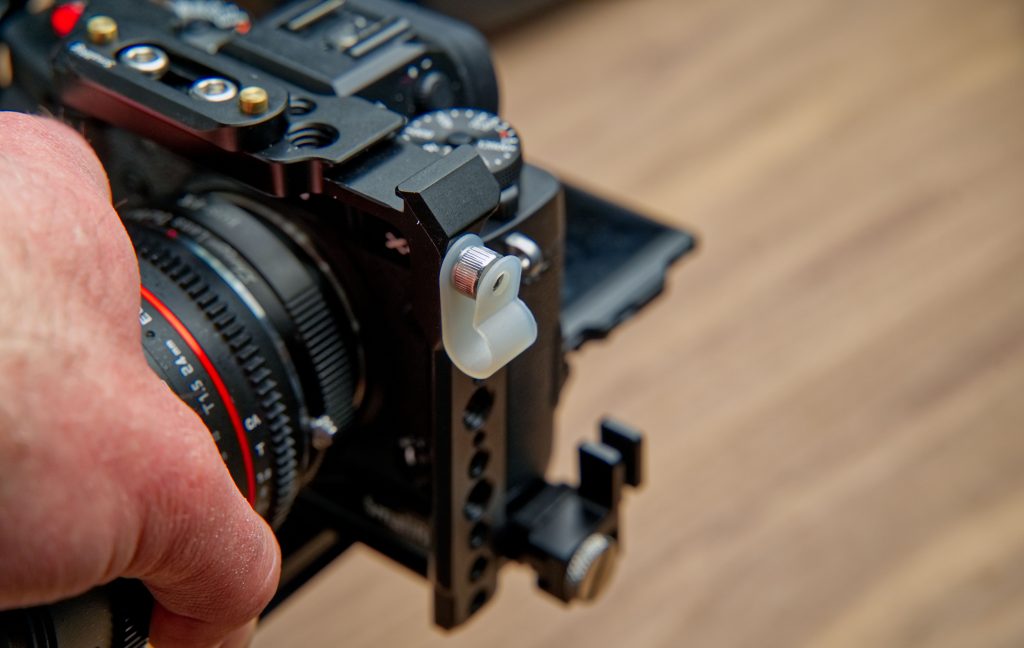
Remember those cable clamps we bought? Take one of those and a small 1/4 20″ bolts (from the extras screws we purchased) and mount it to the left side of the camera cage near the top. Be sure to only use the rear hole of the plastic clamp. We don’t want to fully tie down our cables. This creates a little clip that makes cable management fast and easy. Quick note here, the 1/4 20″ bolt will need to be screwed into the plastic clip so don’t worry if it doesn’t just slide through. If needed, you can make the whole larger with a drill or knife.
you can also add a second clip to the cage if your cables aren’t all fitting together. My 3/8″ cable clamp seems to be large enough for all my cables though.
We can now take any of the extra cable slack and attach it to the cable clamp. If you have the monitor right on top of the camera, you’ll have a lot of extra HDMI and power cable slack. Just clip it to the cage! When you need to extend the monitor arm of move the core rig to a shoulder rig, you can release your cables for extra length. Pretty dank huh?
You now have a finished core rig!
Compatibility
With this “core rig” as I’ve been calling it, you have so much flexibility as a filmmaker. Your shots will be jitter free even on cameras without IBIS (in body stabilization) AND you can add or remove modules very quickly to suit your needs.
As I write this, the core rig is compatible with pretty much every single small to medium camera system including the following and more:
- Canon DSLR and RF cameras
- Sony A7 series cameras
- Panasonic GH and G cameras
- Nikon Z cameras
- Fujifilm X cameras
- Blackmagic Pocket cameras
There are only 4 variables that you might need to adjust when switching cameras.
First, you’ll need a different cage. As I have mentioned, you can pick up a custom SmallRig cage for around $30 to $100 for any camera. So if you upgrade, you’ll need a different cage.
The second variable is the battery plate. If you have the universal Ansso NP-F plate, all you need to do is swap out camera cables and you’re done. If you have a camera specific Ansso battery plate, you’ll need to pickup a new one.
Next is the size of your batteries. We are using Sony NP-F batteries for this system. The battery plate is mounted behind the camera which may interfere with some camera screens. This is why we used that 15mm rod base which raises the camera a little to give us room for the battery. Another option to customize the height of the battery setup is the battery model. Sony NP-F batteries come in 3 main sizes including NP-F550, NP-F770 and NP-F970. The largest 970 size works with most cameras that have a flip up screen (NOT Flip out). If you have a flip out screen like the GH cameras from Panasonic, you can use the two smaller sizes.
And finally, the last variable is your HDMI cable. Unfortunately different cameras use different HDMI jacks so you may have to swap to a different cable when changing cameras.
Recommended Monitors
Obviously the monitor plays a large roll on this rig so I wanted to give you a few options if you don’t yet own a monitor. Here are a few options I would consider depending on your budget:
Atomos Shinobi
This is the monitor I’ve personally used on this rig. Has great battery life, even better features and very lightweight. You can pick the Shinobi monitor up on Amazon or B&H Photo Video.
Andycine A6
This has been my top budget pick for a while now. Solid 1080p monitor that accepts 4K signals and well under $200. You can pick the A6 monitor up on Amazon.

Recommended Batteries
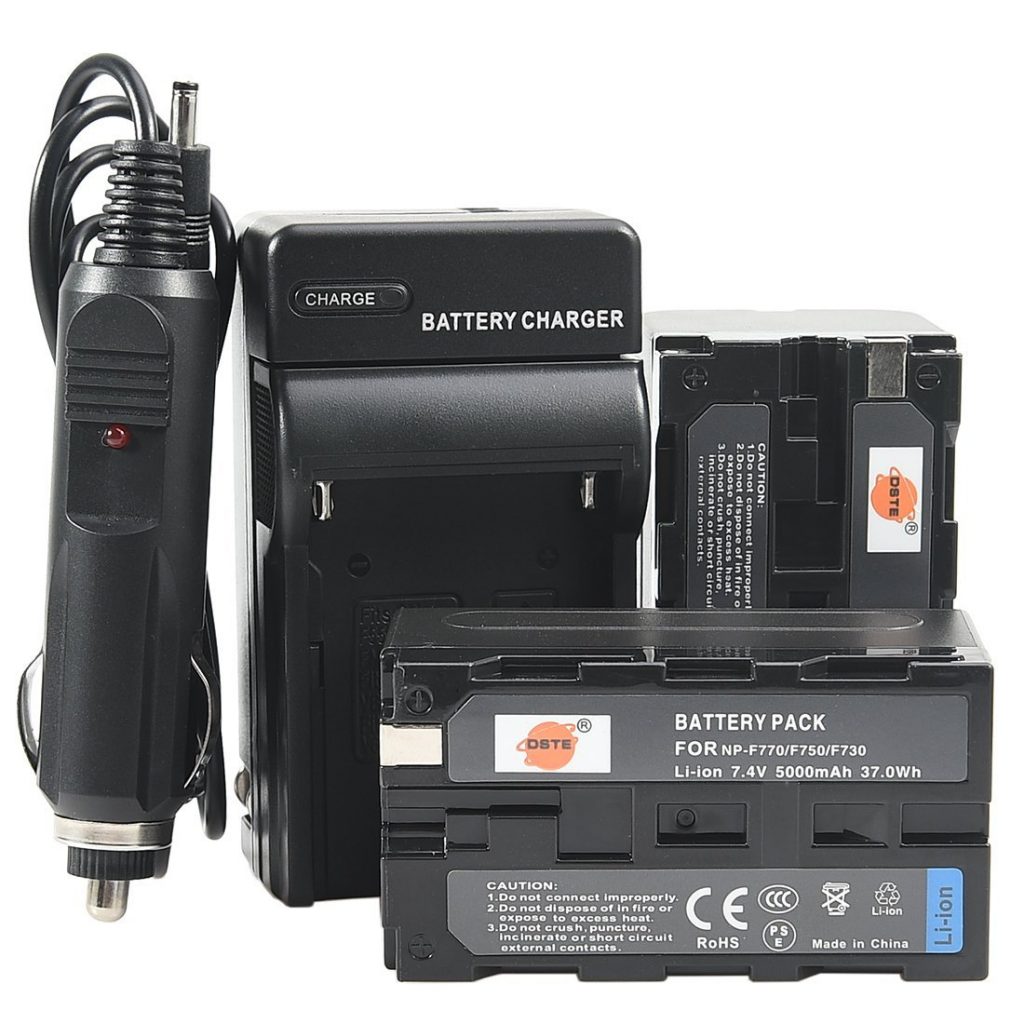
Another huge bonus to this rig is the battery type we are using. Sony F batteries (or NP-F) are wildly popular and available from 3rd party manufactures. They also have roughly 3 different sizes and capacities. I’ve been using DSTE branded batteries for a while and love them. Here is a list of the different battery types available on Amazon:
- NP-F550 (small) batteries on Amazon
- NP-F750 (medium) batteries on Amazon
- NP-F970 (large) batteries on Amazon
Conclusion
I hope this guide has been helpful and would love to hear your thoughts on the rig or any modifications you would make. Questions are welcome and I’ll do my best to keep this guide updated as I continue to refine my personal rig.
Happy handheld shooting!!!
DISCLAIMERS:
Some of these links have an affiliate code, if you purchase gear with these links I will receive a small commission at no additional cost to you. Thank you!
This video was not paid for by outside persons or manufacturers.
No gear was supplied to me for this video.
The content of this video and my opinions were not reviewed or paid for by any outside persons.
